Question:
I have a Change Item on a Change Order document. How do I enter revenue and expense amounts for this Item?
Answer:
There are two ways to enter budget entries for a Change Item: the manual way and the import way. Below are instructions for manual budget entries. For information on how to import budget entries, see KBA-01732: Adding CI Budget Entries from an Import Workbook.
Budget Entries can be of various cost types: Self-Perform, Revenue, RFQ, CCO and Commitment. One Change Item can have any number of budget entries, mixed and matched with any of the cost types.
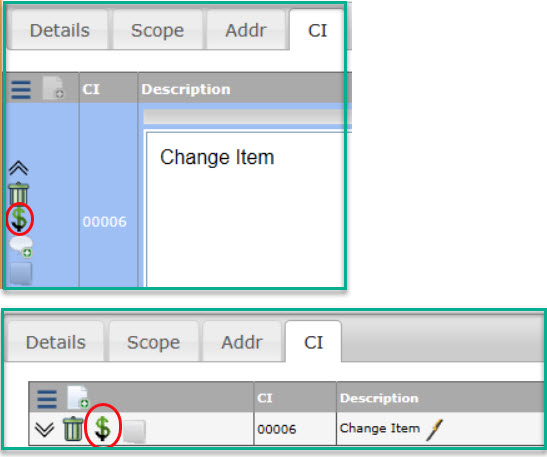
- To begin, click the “budget entries” icon, found either in grid view or in detail view.
To enter a Revenue budget entry:
Note: you can enter Revenue budget entries only until you post Revenue.
- In the Budget Entries window, either
- Click * on the default Self-Perform row to edit it, then select Revenue as the Cost Type or
- Select Revenue as the Cost Type on the last row, then click the “add new” icon.
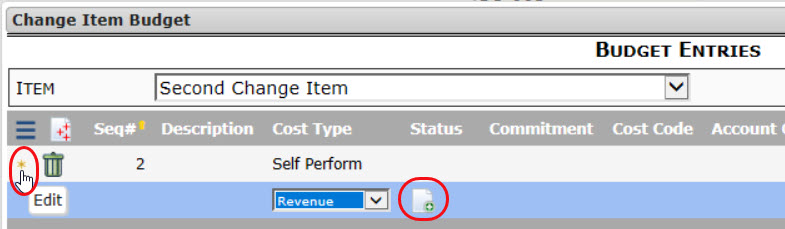
- Enter a Description for the row.
- (optional) Lookup or enter an Account Category if the one listed is not the one desired.
- Enter a Revenue Amount
- Accept the row.
- Remember to save.

To enter a Self-Perform budget entry:
Note: you can enter Self-Perform entries only until you post Expenses.
- In the Budget Entries window, either
- Click * on the default Self-Perform row to edit it, or
- Select Self Perform as the Cost Type on the last row, then click the “add new” icon.
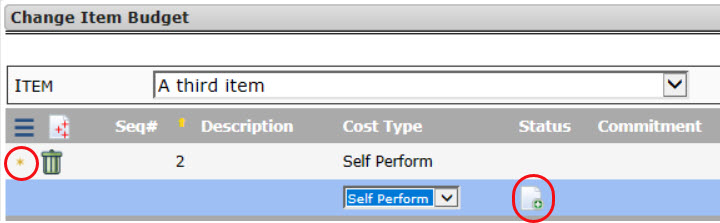
- Enter a Description for the row.
- Enter, look up, or add a new Cost Code.
- Look up or enter an Account Category.
- Enter Units, Rate, Expense, Markup and Revenue as appropriate.
Note: if you will be running the Allocation engine (see KBA-01736) leave the MU field blank. - Accept the row.
- Remember to save.

To enter a CCO budget entry:
Note: you can enter CCO entries only until you post Expenses.
- In the Budget Entries window, either
- Click * on the default Self-Perform row to edit it, then select CCO as the Cost Type or
- Select CCO as the Cost Type on the last row, then either
- Click the “add new” icon or
- Enter an existing CCO in the field.
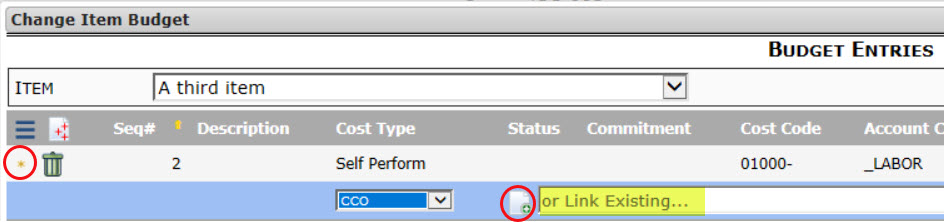
- Enter a Description for the row, if appropriate.
- If creating a new CCO, look up the corresponding Commitment.
- (optional) Enter Estimate, Quote, Expense, Markup and Revenue as appropriate. (See step 6.)
Note: if you will be running the Allocation engine (see KBA-01736) leave the MU field blank. - Accept the row.
- Click the icon to open the CCO, if you wish to enter information directly in the CCO.
- Remember to save the CCO (if changed) and the Budget Entries window.
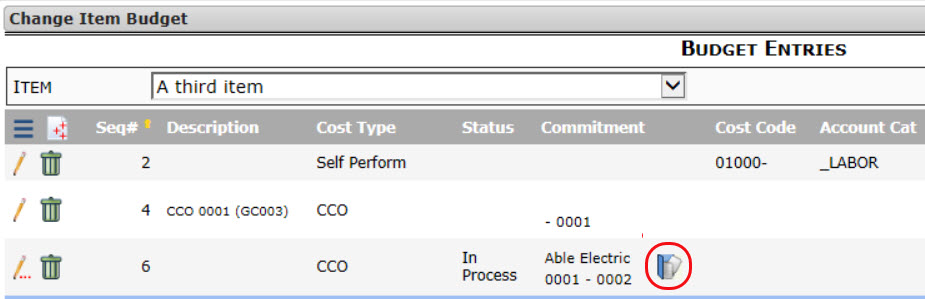
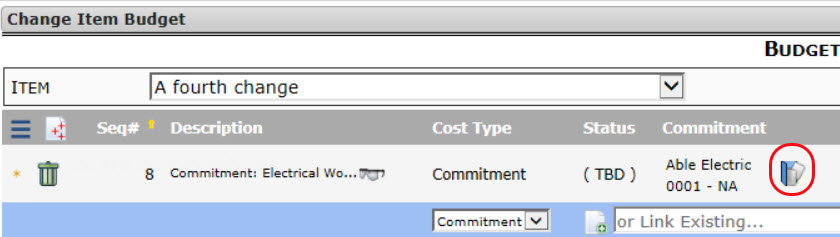
To enter a Commitment budget entry:
Note: you can enter Commitment budget entries only until you post Expenses.
- In the Budget Entries window, either
- Click * on the default Self-Perform row to edit it, then
- Select Commitment as the Cost Type
- Accept the row
- Click the “add new” icon.
- Select Commitment as the Cost Type on the last row, then either
- Click the “add new” icon or
- Enter an existing Commitment in the field. (Click in the field for possible Commitments.)

- Click * on the default Self-Perform row to edit it, then
- (If you click the “add new” icon)
- The new Commitment document will open. Enter your information on the Commitment
- Save the Commitment document.
- You may need to reopen the Budget Entry window on your Change Item if you need to add more entries.
- (If you select an existing Commitment)
- Click the icon to open the Commitment, then enter your information on the Commitment.
- Save the Commitment document.
- Click the icon to open the Commitment, then enter your information on the Commitment.
- Back on the Budget Entries window, save to update the Expense and Revenue columns.
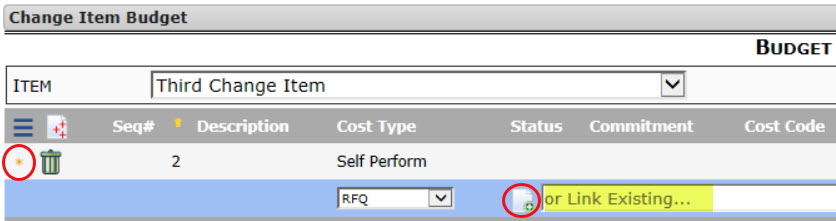
To enter an RFQ budget entry:
Note: if your intention is to create several RFQs based on existing project Commitments, see the workflow in KBA-01733 and KBA-01734 instead. RFQs can be entered only until Expenses are posted.
- In the Budget Entries window, either
- Click * on the default Self-Perform row to edit it, then
- Select RFQ as the Cost Type
- Enter or lookup the corresponding Commitment.
- Select RFQ as the Cost Type on the last row, then either
- Click the “add new” icon or
- Enter an existing RFQ in the field. When you start typing, a list of possible RFQs will appear. Select one.
- Click * on the default Self-Perform row to edit it, then
- (If you click the “add new” icon)
- Enter a Description for the row.
- Enter or look up a corresponding Commitment.
- (optional) Enter Estimate, Quote, Expense, Markup and Revenue as appropriate (see step 4).
Note: if you will be running the Allocation engine (see KBA-01736) leave the MU field blank. - Accept the row.
Note: if you enter information on the Budget Entries window, you need not open the RFQ document. The information will appear on the RFQ document also.
- (If you are using an existing RFQ)
- Click the icon to open the document.
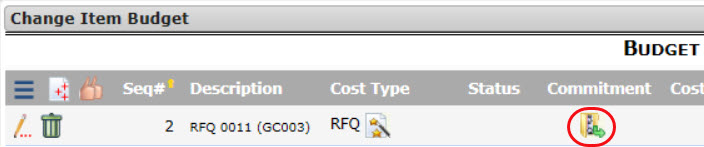
- Add information.
- Save the document.
- Click the icon to open the document.
- Remember to save the Budget Entries window.
Additional Comments:
In budget entries, if you enter a Markup percentage, the Revenue amount will be calculated and if you enter a Revenue amount, the Markup percentage will be calculated. For information about setting up Allocations, see Setting Up Allocations and Markups for a Project.
KBA-01730; Last updated: May 29, 2018 at 10:07 am