Attachments are added and accessed through the Attachments tab that appears on all Spitfire documents.
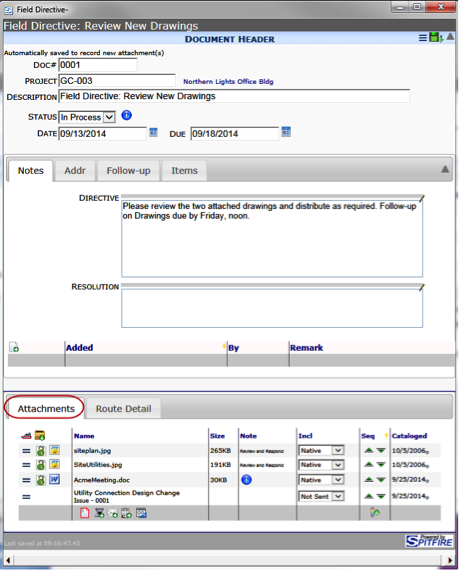
Attachments can be both files and Spitfire documents. In this case, the first two are .jpg files, the next is a Word file, and the last is a Spitfire document (Issue).
Attaching Files, Documents, and Links
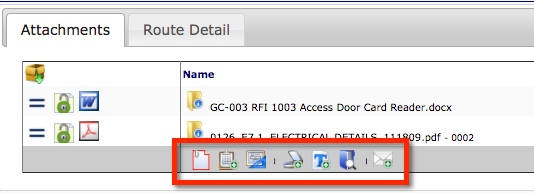
There are several methods for creating an attachment for a document:
- drag and drop a file onto the Attachments tab
- scan or upload a new file or link
- attach a file or document already in the Spitfire Catalog
- attach files that are already attached to a document
- create a file from an Attachment template
- attach a file via e-mail from a mobile device
All of these types of attachments can also be attached to specific items within the document.
Note: Before an attachment can be added to a Spitfire document, you must save the document. Once a document has been saved, icons appear at the bottom of the Attachments tab.
Attachments Tab Columns

The Attachments tab list the files and documents attached to the document and provides the following columns of information for each line item.
| Name | File names, Document names, and corresponding Doc Types appear here. |
| Size | The size of the file in KB or MB. |
| Note | The contents of the Note field for each attachment. Notes are specified on the Add Files tool of the Properties window. System notes, such as “Auto Attached” may also appear here. |
| Include | The include status of the attached file/document. Possible options indicate if and how the file will be included in routed e-mails, faxes, and hard copies. – Assemble: include this file in one merged PDF file (along with all other Assembled files). – Native: include this file in its native format. – Not Sent: do not include the file when it is routed via e-mail or fax. – PDF: convert the file to a PDF. |
| Seq | A way to change the order of included files. Files are assembled in the order they appear on the list. There are three ways to change the order of rows in the Attachment tab. – Use the mouse to drag-and-drop a row up or down. Grab the row in the first column (you’ll see the cursor change to a double-headed arrow). After you move all the rows you want to move, save the document and keep the new sequence. – Click the Up or Down arrows to move a file. – Click Enable In Grid Sequence Changes to toggle the Seq column and display numeric fields, in which you can indicate new numbers for the files you want to move up or down. |
| Cataloged | The date the file was cataloged (ie, added to the Spitfire Catalog). |