To edit a Mask:
- Display the detail part for the mask you would like to edit.
- Click Edit to edit an existing segment or click Add a Segment to add a new segment to the mask. (If the icon is disabled, you cannot add segments.)
- If necessary, edit or enter the Length and Name for the segment. These fields are required for new segments.
- (optional) Select a different Mask Type from the drop-down list.
- (optional) Enter a Lookup.
- (optional) Enter the Values that can be used in the segment.
- Accept your changes.
- Save your masks.
Example
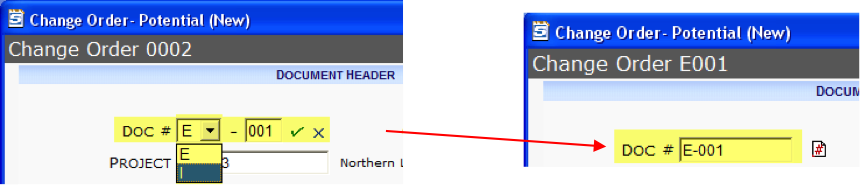
Let us say you want to add and define a mask (COID) to be used on the IDs of Change Order documents. The mask will allow users to select the first segment (E for External/Owner change orders or I for Internal change orders) and sfPMS will automatically populate the second segment with a three-digit number. So Change Order IDs will follow the format I-001, I-002, I-003, and E-001, E-002, etc.
First Task
In order for the mask to appear in the Mask Maintenance tool, you first edit your SiteConfig.xml file.
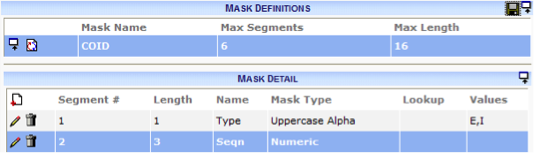
Second Task
Using the Mask Maintenance tool, configure the mask as shown below.
Third Task
Go to the Rules Maintenance tool and add the DocTypeConfig | DocNoMaskName rule to allow this Mask to be used on your Doc Type.
With the mask all set up, users can modify the default Doc # in Change Order documents.