To enter an FAC Change:
- In the Forecast Data Entry form, navigate to the appropriate Cost Code or Account Category.
- Ensure the FAC vs. FTC option is set appropriately.
- Enter the new value in the appropriate field (Amount or Production Units).
- Press Tab or Enter to indicate your entry is complete.
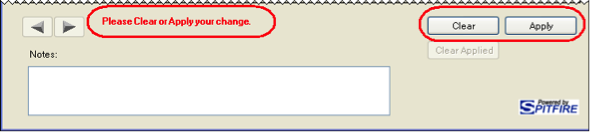
A message will appear indicating your change, and the Clear Declare and Apply Declare buttons will become active.

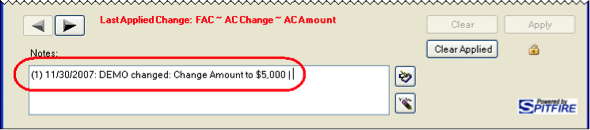
- Click Apply to apply the change to your Forecast. A message will appear in the Notes field.
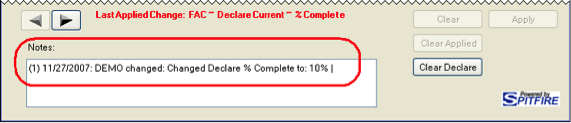
Note: If you change your mind, you can click Clear Declare to cancel your change. A message will still appear in the Notes field.
- (optional) Navigate to another Account Category or Cost Code using the arrow keys then repeat steps 3-5. Rows that have been changed will appear in a different color/font on the Forecast worksheet.
To enter an FAC Change:
- In the Forecast Data Entry form, navigate to the appropriate Cost Code or Account Category.
- Ensure the FAC vs. FTC option is set appropriately.
- Enter the new value in the appropriate field (Amount or Production Units).
- Press Tab or Enter to indicate your entry is complete.
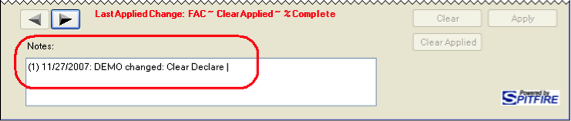
- Click Apply to apply the change to your Forecast. A message will appear in the Notes field.
Note: If you change your mind, you can click Clear Applied to cancel your change. A message will appear in the Notes field.

- (optional) Navigate to another Account Category or Cost Code using the arrow keys then repeat steps 3-5. Rows that have been changed will appear in a different color/font on the Forecast worksheet.