System Administrators (and anyone with PART | Can Customize BFA Settings (RS) role capability) can set site-specific settings for the BFA workbook that are then used instead of Spitfire defaults. Local (specific workstation) settings are always loaded last using either the Spitfire or site defaults as starting points.
To open the Setup worksheet for site settings:
- From the Spitfire menu, select Site Settings.

- In the confirmation box, click OK.
The Setup window will display the site setting area (which is normally hidden).
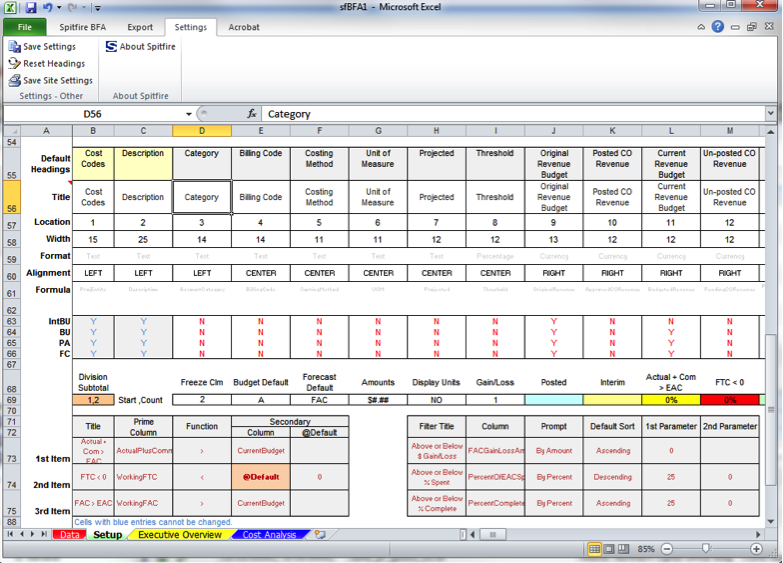
To make changes on the Setup worksheet on the site level:
- Click on a cell in the section you want to change.
- Make your change(s).
- Tab out of the cell.
- Change as many options as you’d like at one time.
- Save your change(s) for subsequent openings of the BFA workbook by selecting Save Site Settings from the Spitfire menu.
- At the confirmation window, click Yes. A Save As dialog box will appear. While you can choose any location for your Site Settings file, we recommend you save the file, as named, to your desktop. You will need to upload your saved file to sfPMS in order to have the BFA workbook use those settings. Upload of the file is done through the Templates tool on the Manage Dashboard or System Admin Dashboard.
Note: Any columns that have been made inactive will ignore these settings.
Column Headings/Title (Site)

Spitfire-default column descriptions fill the Default Headings (shown above in yellow). These descriptions also fill the Title cells (shown in green) until you make changes.
To edit your column headings, type new column headings for the columns you want to change on the Title row.
Location (Site)

You can indicate the order of columns on the Data worksheet by changing the Location numbers on the Setup worksheet. You can also make a column inactive by changing its location to 0 (zero).
On all modes of the BFA, certain columns are required. Those columns are indicated by a light yellow background (as shown above). You should ensure that all such columns have a location number. You can indicate which columns are visible for each mode in the Mode Selection area, but if you do not give all mandatory columns a location number, you will see the following message when you save:
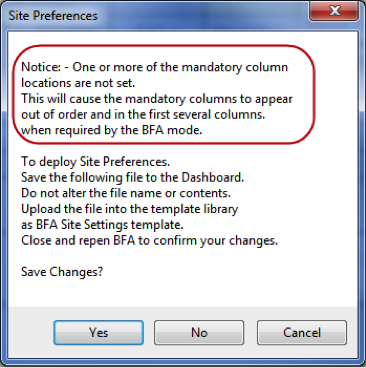
Changes to the order of columns apply to all modes of BFA – all modes use the same column order, although different columns can be visible/hidden on each of the modes.
To reorder the Data worksheet columns:
- Plan the order of the columns.
- On the Location row, delete the current numbers of those columns.
- Type numbers (starting with 1 for the first column) in the cells of those columns you want reordered.
Note: Blank cells or cells with the number 0 will be considered inactive and not displayed. - Review the Location row to make sure a number is not repeated. Columns will be sorted numerically left to right.
Width (Site)

All columns on the Data worksheet have a default width, which you can change.
To change the width of one or more columns, type new widths in the Width row. The widths are in the Microsoft Excel unit of measure.
Alignment (Site)

The text or numbers in the Data worksheet cells can be aligned to the left, center, or right.
To change the alignment of one or more columns, select new alignments from the drop-down menu on the Alignment row.

Mode Selection
You can indicate which columns will be visible in which modes.
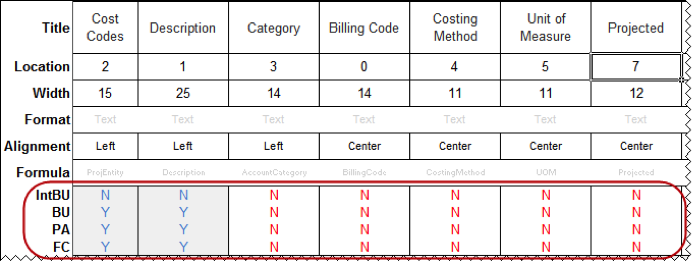
IntBU – Initial Budget mode
BU – Budget mode
PA – Project Analysis mode
FC – Forecast mode
To indicate in which modes a column should be visible/hidden, select Y (visible) or N (hidden) from the drop-down menu.

Notes:
- Cells on the Setup worksheet with blue entries cannot be changed.
- If a column has been made inactive, the Show Column Visibility choice is ignored. In addition, the Show Column cell is locked, and you will get a warning if you try to change it.
- Hiding columns does not affect calculations that may be dependent on the data within the cells in hidden columns.
User Calc Field Columns (Site)
If you scroll to the right on the Setup worksheet, you will find ten possible user-defined calculation columns (initially called UCF 1 through UCF 5). These columns can hold formulas and create data not elsewhere on the Data worksheet. Aside from changing the title, location, width and alignment of these columns (as described previously) you can specify a format and formula for each of these columns, as necessary and—if using a Division Totals or Billing Code Totals worksheet—a subtotal handling code.
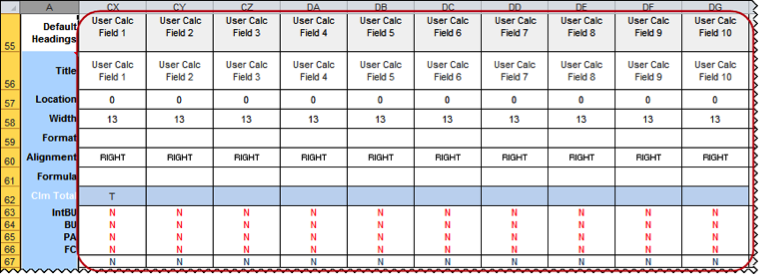
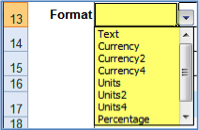
To select a format for a User Calc Field column:
- Text – alphanumeric characters treated as text.
- Currency – numbers treated as currency, as defined in the Amounts setting (see page 54).
- Currency2 – numbers treated as currency, with two decimal places, and never altered by other Setup settings such as Amounts.
- Currency4 – numbers treated as currency, with four decimal places.
- Units – numbers treated as numerals, with no decimal places.
- Units2 – numbers treated as numerals, with two decimal places.
- Units4 – numbers treated as numerals, with four decimal places.
- Percentage – numbers treated as percentages.
- Percentage2 – numbers treated as percentages with two decimal places.
- Date – numbers treated as dates.
Formula
To indicate a formula for a User Calc Field column:
Note: You can use F3 while in the User Calc Field cell to open a Defined Names pop-up list. Selecting Defined Names for your formula is recommended—while direct references to a cell like “B3” will work, the probability of error when filters, sorts, and column visibility are applied to the data is great.

Column Totals
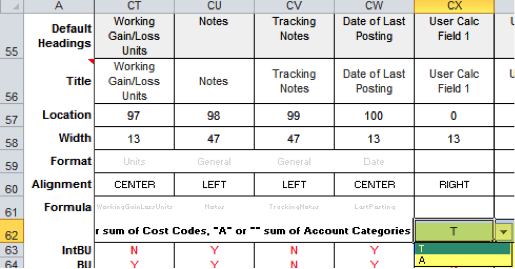
Column Totals refer to the totals that appear at the top of the column on the Data worksheet. Column Totals are blank if the format for a User Calc Field is blank or text. Otherwise, Column Totals are defaulted to the sum of the Account Categories. However, you can indicate that you want totals to be the sum of the Cost Codes instead.
To indicate that totals should sum by Cost Code:
- Scroll to a User Calc Field column.
- In the Clm Total row (row 62), select T from the drop-down menu.
Subtotal Row Handling
If you want to use any of the User Calc Field columns in your Division Totals or Billing Code Totals worksheet, you should indicate how subtotal rows are to be handled on those columns—whether the subtotal row should sum its constituent amounts, should use a formula, or should remain blank. During the initial creation of the Division Totals or Billing Code Totals worksheet, User Calc Field formulas are reviewed and converted for use in the associated worksheet. The conversion remains in place during the session of BFA or until the user makes changes to the Setup data. If a formula would return invalid results, that User Calc Field column is treated as N for none (blank).
For example, the codes on the following User Calc Field columns would result in the following on the Division Totals worksheet.

