Question:
When we tried to approve a Change Order, we got a message about “negative EAC.” What does this message mean? What are our options when we get that message?
Answer:
Spitfire uses the BudgetConfig | PreventNegativeEAC rule to block budget revisions from posting whenever any budget line would go negative. This rule, which is ON by default, can be configured through the Rules Maintenance tool on the System Admin Dashboard for each Budget subtype. For example, if you have this rule ON for revisions created through CCOs, Spitfire will block approval of any CCO that would lead to a negative line on the budget. In fact, the following message will appear:
Negative EAC ($amount) would result on cost code xxx…
When you see that message, you either have to investigate to see what other budget or change order adjustments you can make so that the cost code/account category row in question does not go into the red, or ask your System Admin to turn the rule OFF (either temporarily or permanently) if you intend for your budget to go negative.
To override Spitfire’s default:
- Expand the BudgetConfig rule group in the Rules Maintenance tool.
- Use the Rule Name filter to filter for PreventNegativeEAC to see if you already have this rule in place for the specific Doc type. For example, in the picture below, there already is a rule for CC (which means CCO). If you see a rule for the specific budget subtype, you should edit that row and skip to step 6. Otherwise, continue with step 3. Note: the system defaults will not appear.
- Select PreventNegativeEAC:% from the rule drop-down.
- Click the Add icon to add a new row.

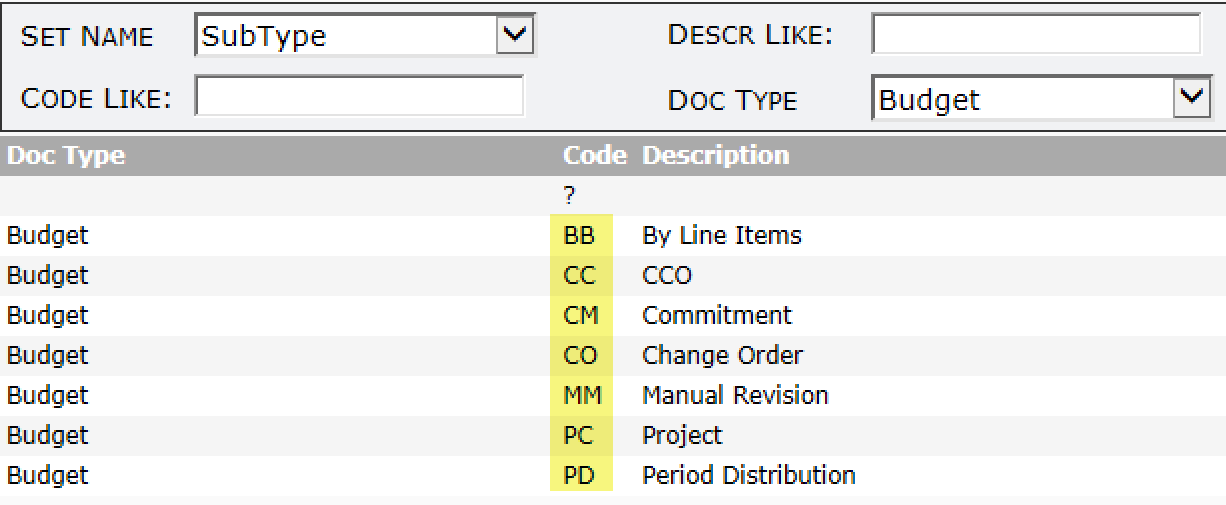
- In the rule, replace % with the two-letter code for the subtype that you want, then TAB out. Defaults for the Budget subtypes are shown below:


- In the Filter Value, select Budget then TAB.
- In the Result Value, click for your choice (X for No, checkmark for Yes).
Note: a new row seems to have an X as the Result Value, but if you want that X, you’ll need to click to turn it into a checkmark and then click again to get back to an X. In other words, you need to explicitly choose X. - Save your changes.

- On the System Admin Dashboard, click the Reload Configuration button.
