The Build Route Option can help you create your route. It provides an easy way to add several routees at the same time.
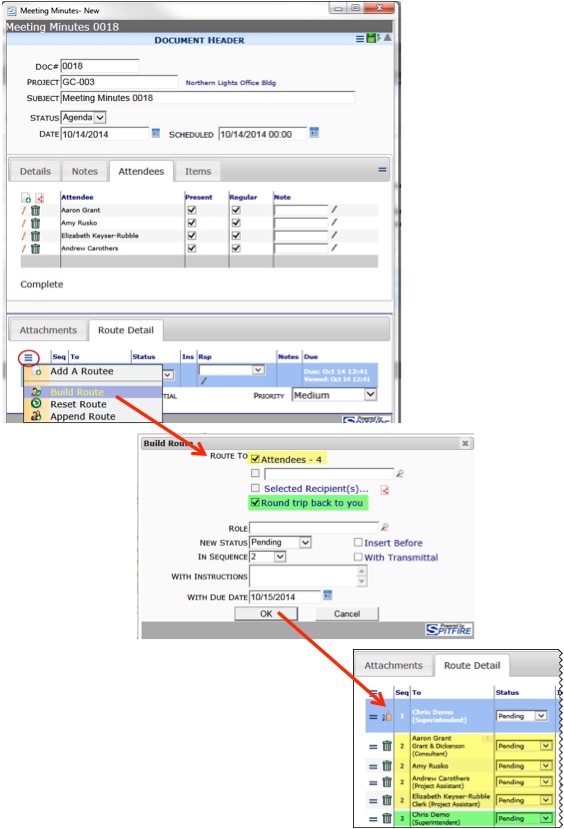
Using the Build Route Option:
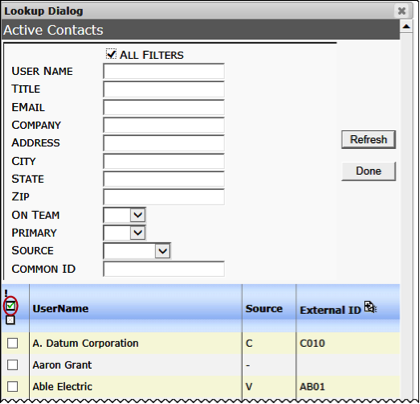
- Open the Route Options menu and select Build Route. A Build Route dialog box will appear. Exactly which checkboxes appear depends on the Doc Type and the contents of the document. Depending on the Doc Type, checkboxes for Addresses, Primary Contact, Attendees, and Responsible Parties will be included. In all cases checkboxes for a Lookup field, a Selected Recipients icon, and the “round trip” option will appear.
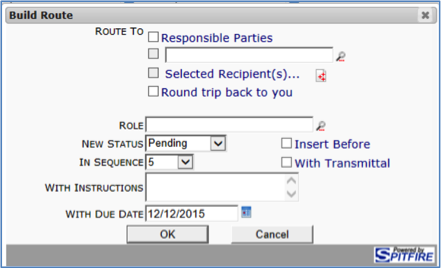
- Click the Route To checkboxes to indicate whom you want to include in your route.
- Click Round trip back to you to add yourself to the end of the routing list.
- (optional) Lookup a Role if you want to limit the routees indicated in the Route To selections to just those with the selected Role.
- (optional) Use the drop-down list to select a New Status for your routees.
- (optional) If you already have routees listed, you can use the drop-down lists to select the In Sequence placement. All new routees will have the same Seq number, although you may change any of them on the Route Detail tab.
- (optional) If you want to add certain routees before others, click Insert Before.

- (optional) Click With Transmittal to include a transmittal cover sheet.
- (optional) In With Instructions, type any necessary notes.
- Verify the default Due Date. If necessary, enter a new Due Date or delete With Due Date.
- Click OK.
- Save the route and the document.