
Did You Know?
If you have the SYS| Can Add Contact on the Fly capability in one of your roles, you can add a new Contact to the system directly from the Route Details tab. Spitfire has long provided this feature because we know that sometimes users want to add people to a document route before that person has been added as a Contact to Spitfire.
How It Works:
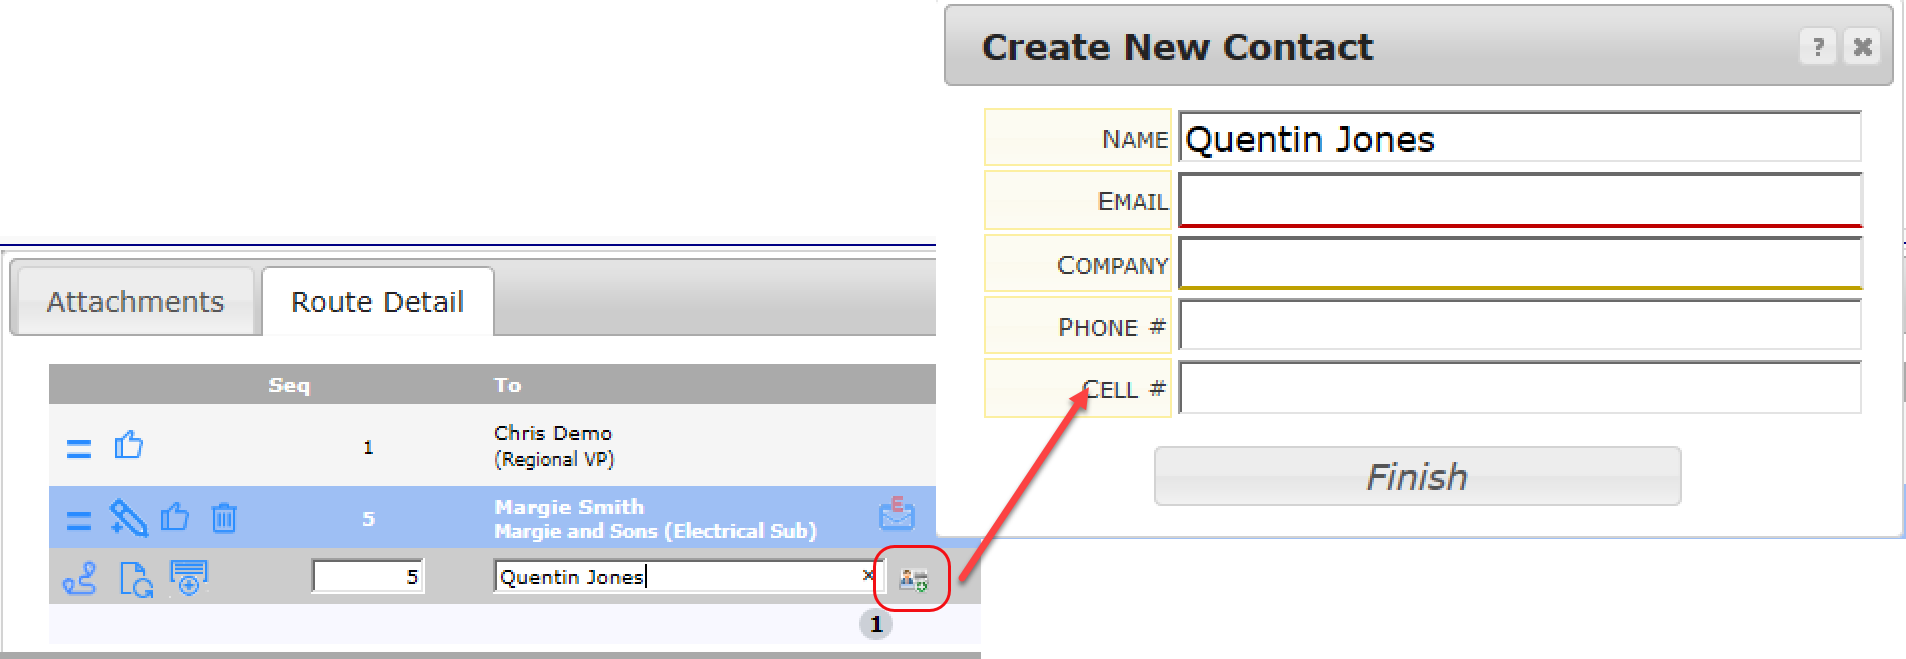
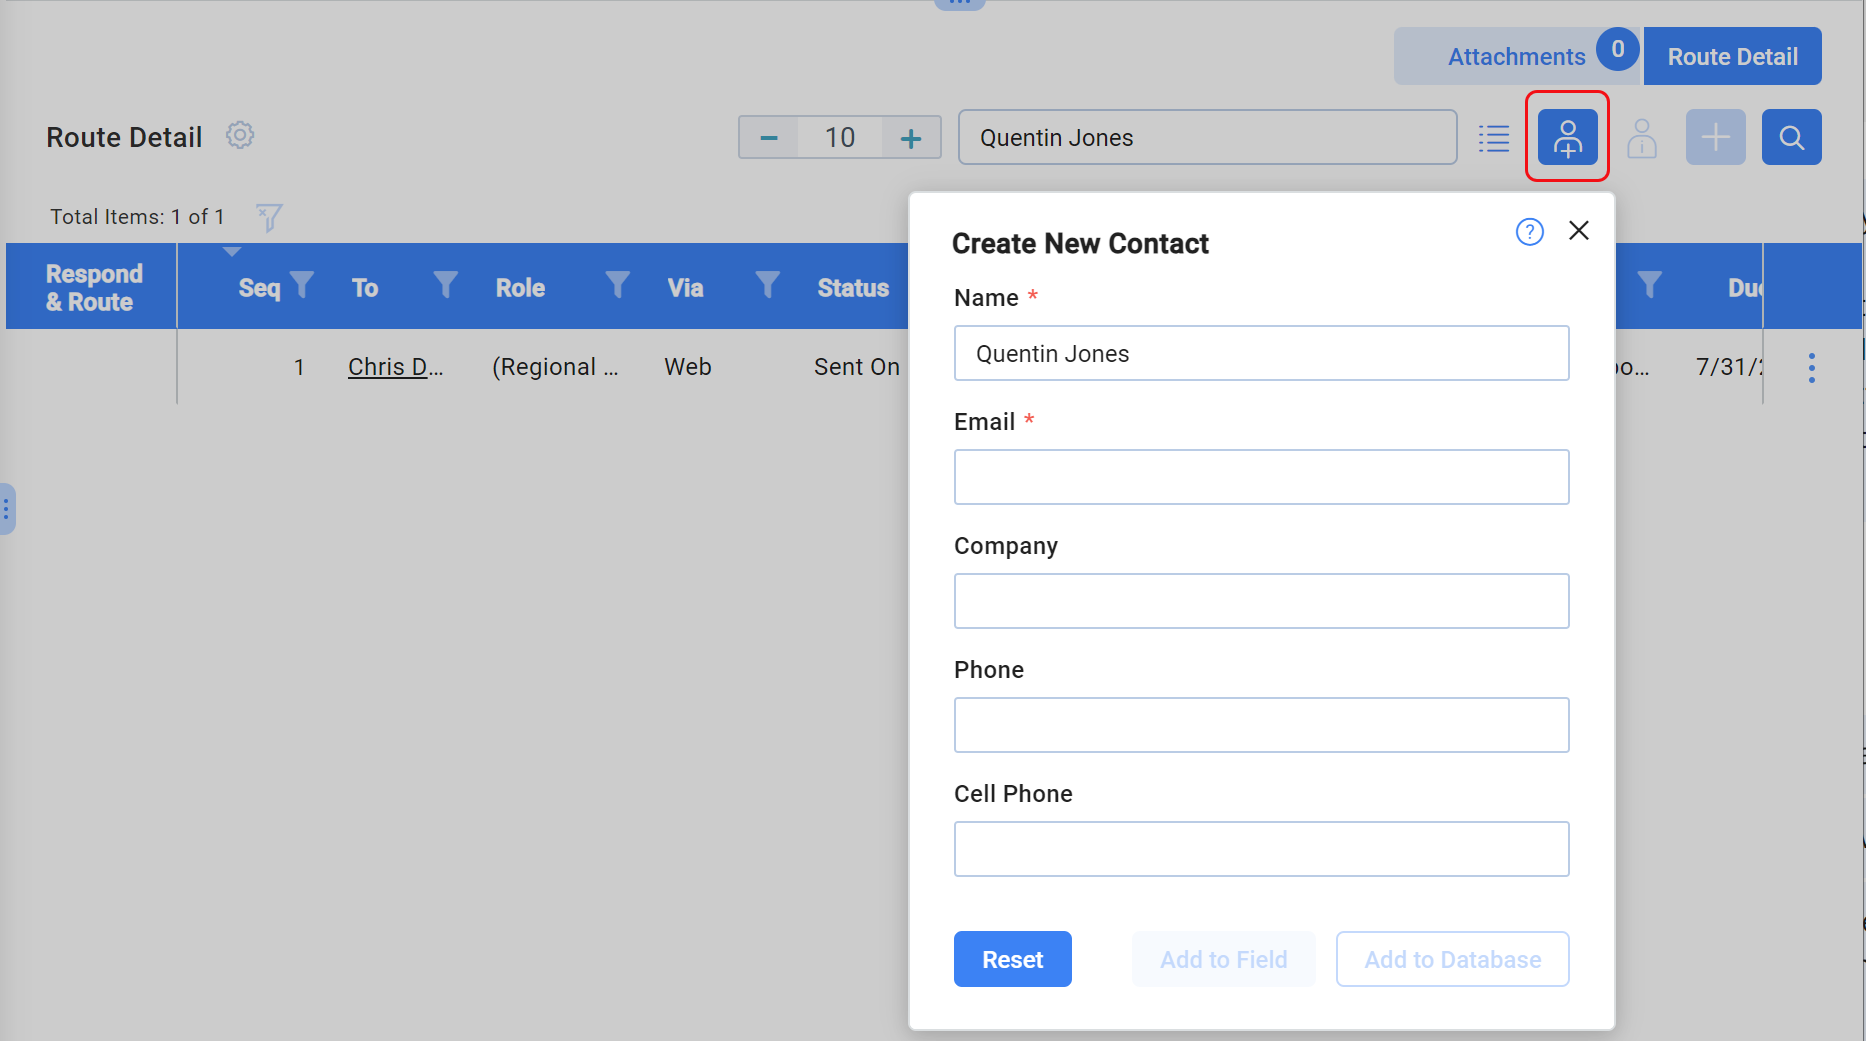
If you type a name not recognized by Spitfire:
If you type a name that is not in your Spitfire Contacts Dashboard, an icon will appear. You can open the Create New Contact window by clicking on that icon. (The window will actually open automatically when you tab out of the field.)
 OR
OR
- Fill out the window fields. You can leave some of the fields blank but you must enter an email address. Unless you have extra permission, you will need to use an email address that resolves to an existing company.
- Click the Finish/Add to Database button.
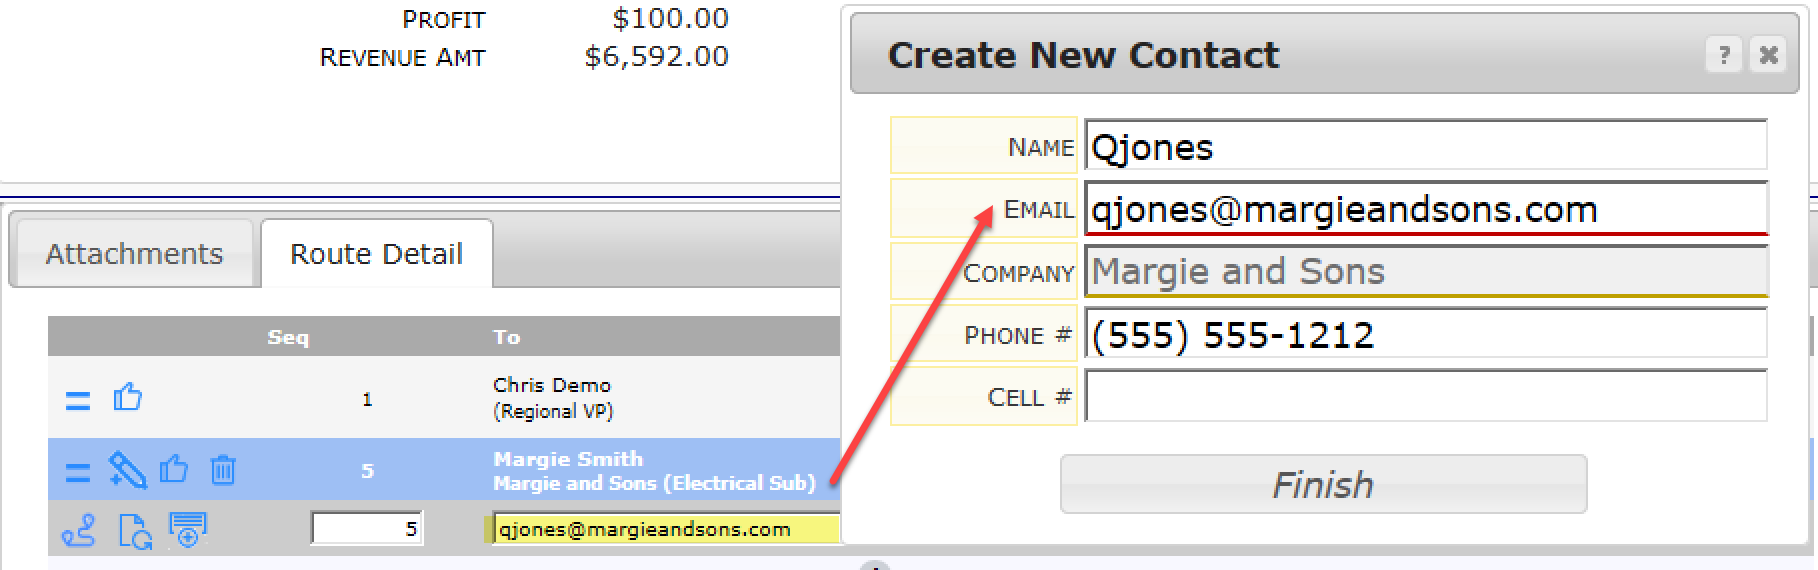
If you type an email address not recognized by Spitfire:
If you know that a person is not in your system, you can type the email address instead. The Create New Contact window will use that information (provided that Spitfire can associate the email address with an existing company.)
 OR
OR
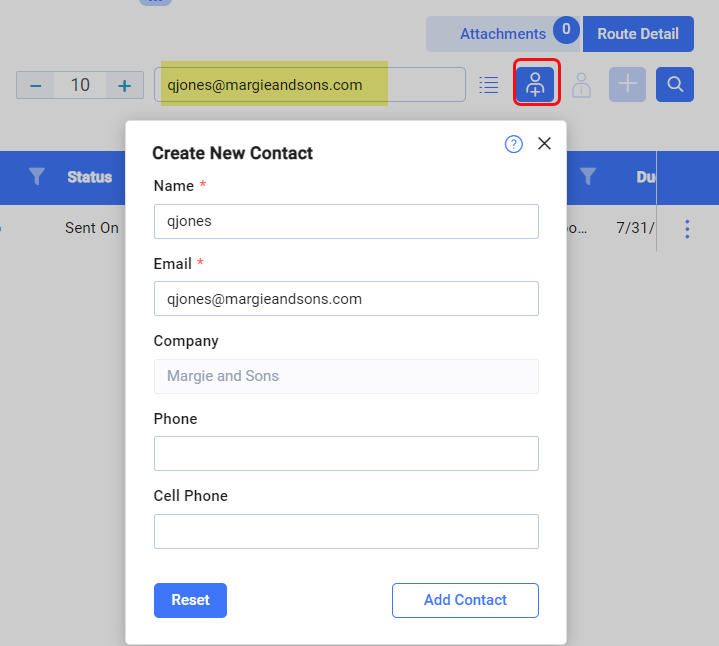
- Edit the Name field if the person’s full name does not appear. (Whatever is before the @ in the email address will appear as the name.)
- (Optional) Fill out the window fields.
- Click the Finish/Add Contact button.
Spitfire will create a Contact Detail for this person (in the Contacts Dashboard). Short term, you can proceed with your document, for example, adding others to the route or routing the document to the new Contact. Long term, you (or someone else in your company) should review and possibly add to the person’s Contact Details.
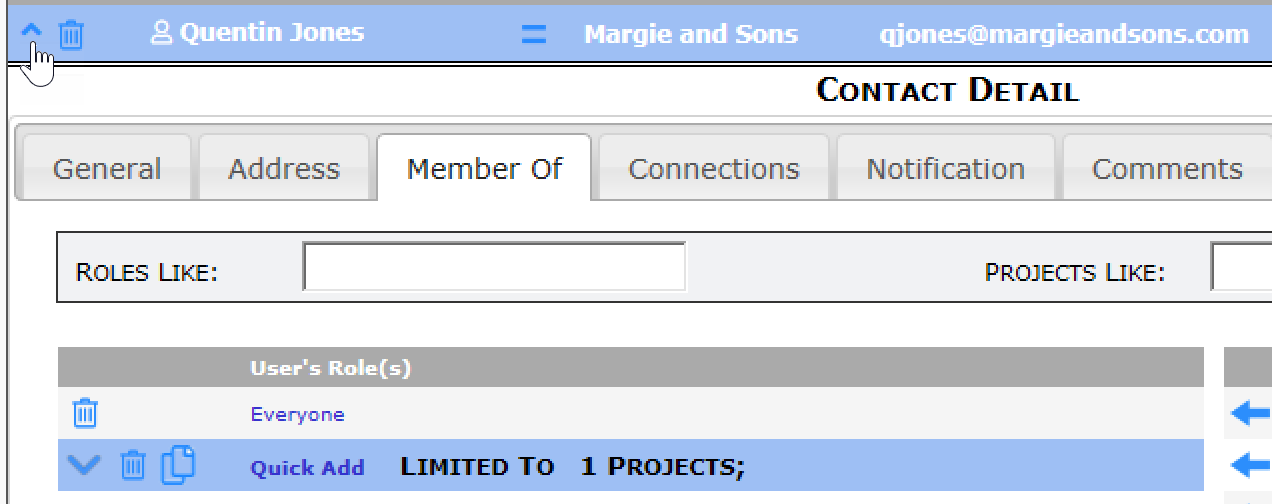
Contact Details
You or your Contact Manager will need to flesh out the Contact Details on the Contact Dashboard at some point.
- Find this person on your Contact Dashboard.
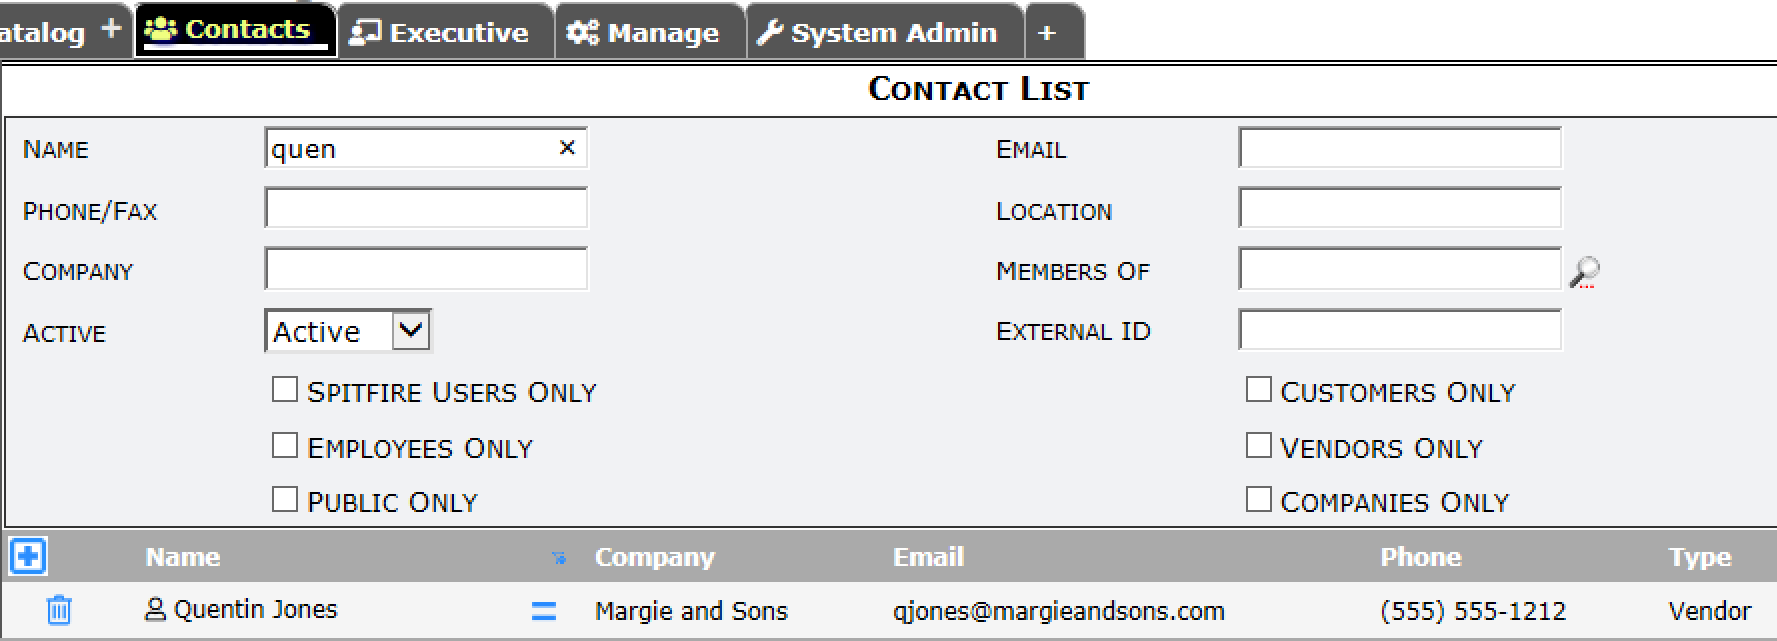
- Open the Contact Details for this person.
- Review the information on the various tabs and add information as desired. You’ll notice that a special “Quick Add” role is assigned to any Contact created on-the-fly to help identify such Contacts.
- Remember to save any changes.