Did You Know?
The same UI Configuration tool (on the System Admin Dashboard) that allows you to add, modify and hide fields, columns and tabs on documents also allows you to change the order of columns and add/hide the columns in the various grids on your dashboards.

Column Grids that can be configured:
- Watchdog Alerts on the Home Dashboard [Part = Alert List]
- Catalog Document and File Search Results [Part = Catalog Search]
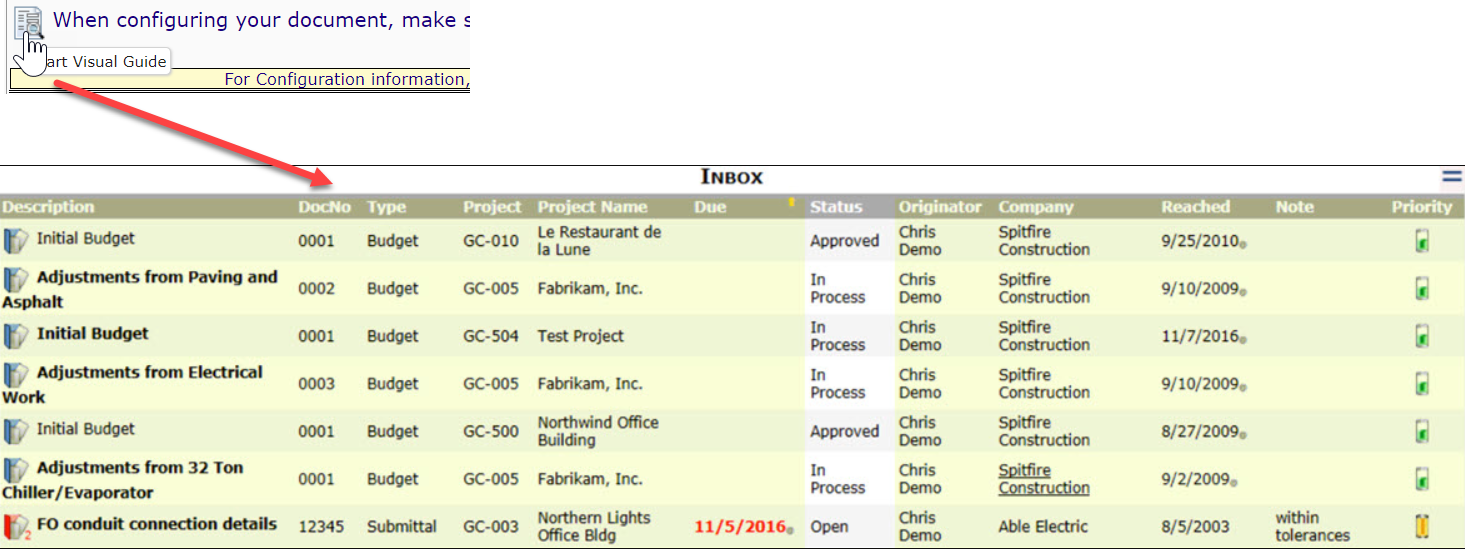
- Inbox on the Home Dashboard [Part = Inbox]
- Cost Analysis Detail on a project [ Part = Project Cost Analysis]
- Document list on a project [Part = Project Doc List]
- Executive Summary list [ Part = Project Exec Summary]
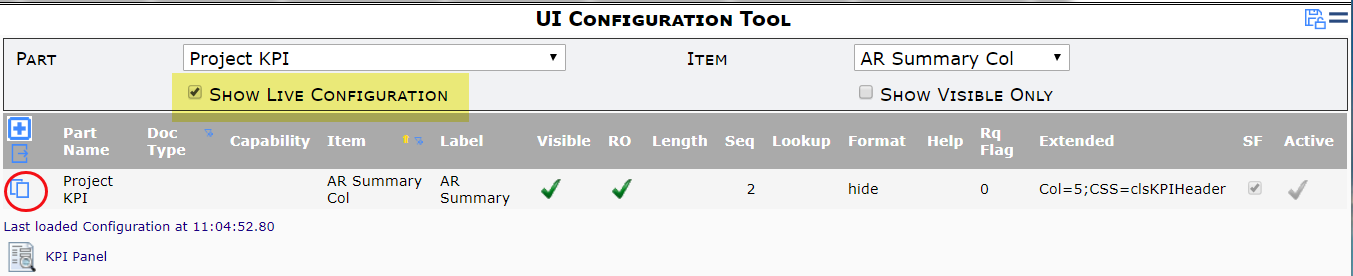
- Key Performance Indicators on a project [Part = Project KPI, includes custom columns]
- Linked Projects on a project [Part = Project Links]
- Project List on Home Dashboard [Part = Project List]
Tips:
- When you first go to the UI Configuration tool on the System Admin Dashboard, there may be a Doc type in the Doc Type filter. In most cases, you’ll want to select the blank row as the filter before selecting the Part that you want to configure

- However, if the part you want to configure is Project Doc List, and you want to make changes just for one Doc type, you should select that Doc type.
- After you select the Part filter, you can click the icon at the bottom to see which columns are available and can be hidden. Configurable columns are highlighted in yellow. Note that the picture for Project Team does not show the many custom columns that can be added to this part.
- You can add/hide columns through the Visible field and relabel columns through the Label fields:
- After you select the Part filter, select the Item that you want to add/hide or relabel.
- Click the Show Live Configuration checkbox.
- If only the system default shows up, click the copy icon to add a row then make your changes there. Otherwise, edit your existing row.
- To reorder columns:
- After selecting the Part, with the Item filter blank, click the Show Live Configuration checkbox.
- Click the Show Visible Only checkbox. You will then see all the columns currently visible in this part.
- If any of the rows are Spitfire-defaults, you will need to copy those rows in order to re-sequence them.
- On each row, enter a Seq number to indicate the position of that column, counting from left to right where the leftmost column is zero* and the one to the right of that column is 1 (or any number greater than 1). (*You cannot move the first column in any grid or list.). While using consecutive numbers such as 1,2,3, etc. is not technically wrong, it is better to use numbers that allow columns to be moved in the future without having to reorder everything, for example, 10, 20, 30, etc.
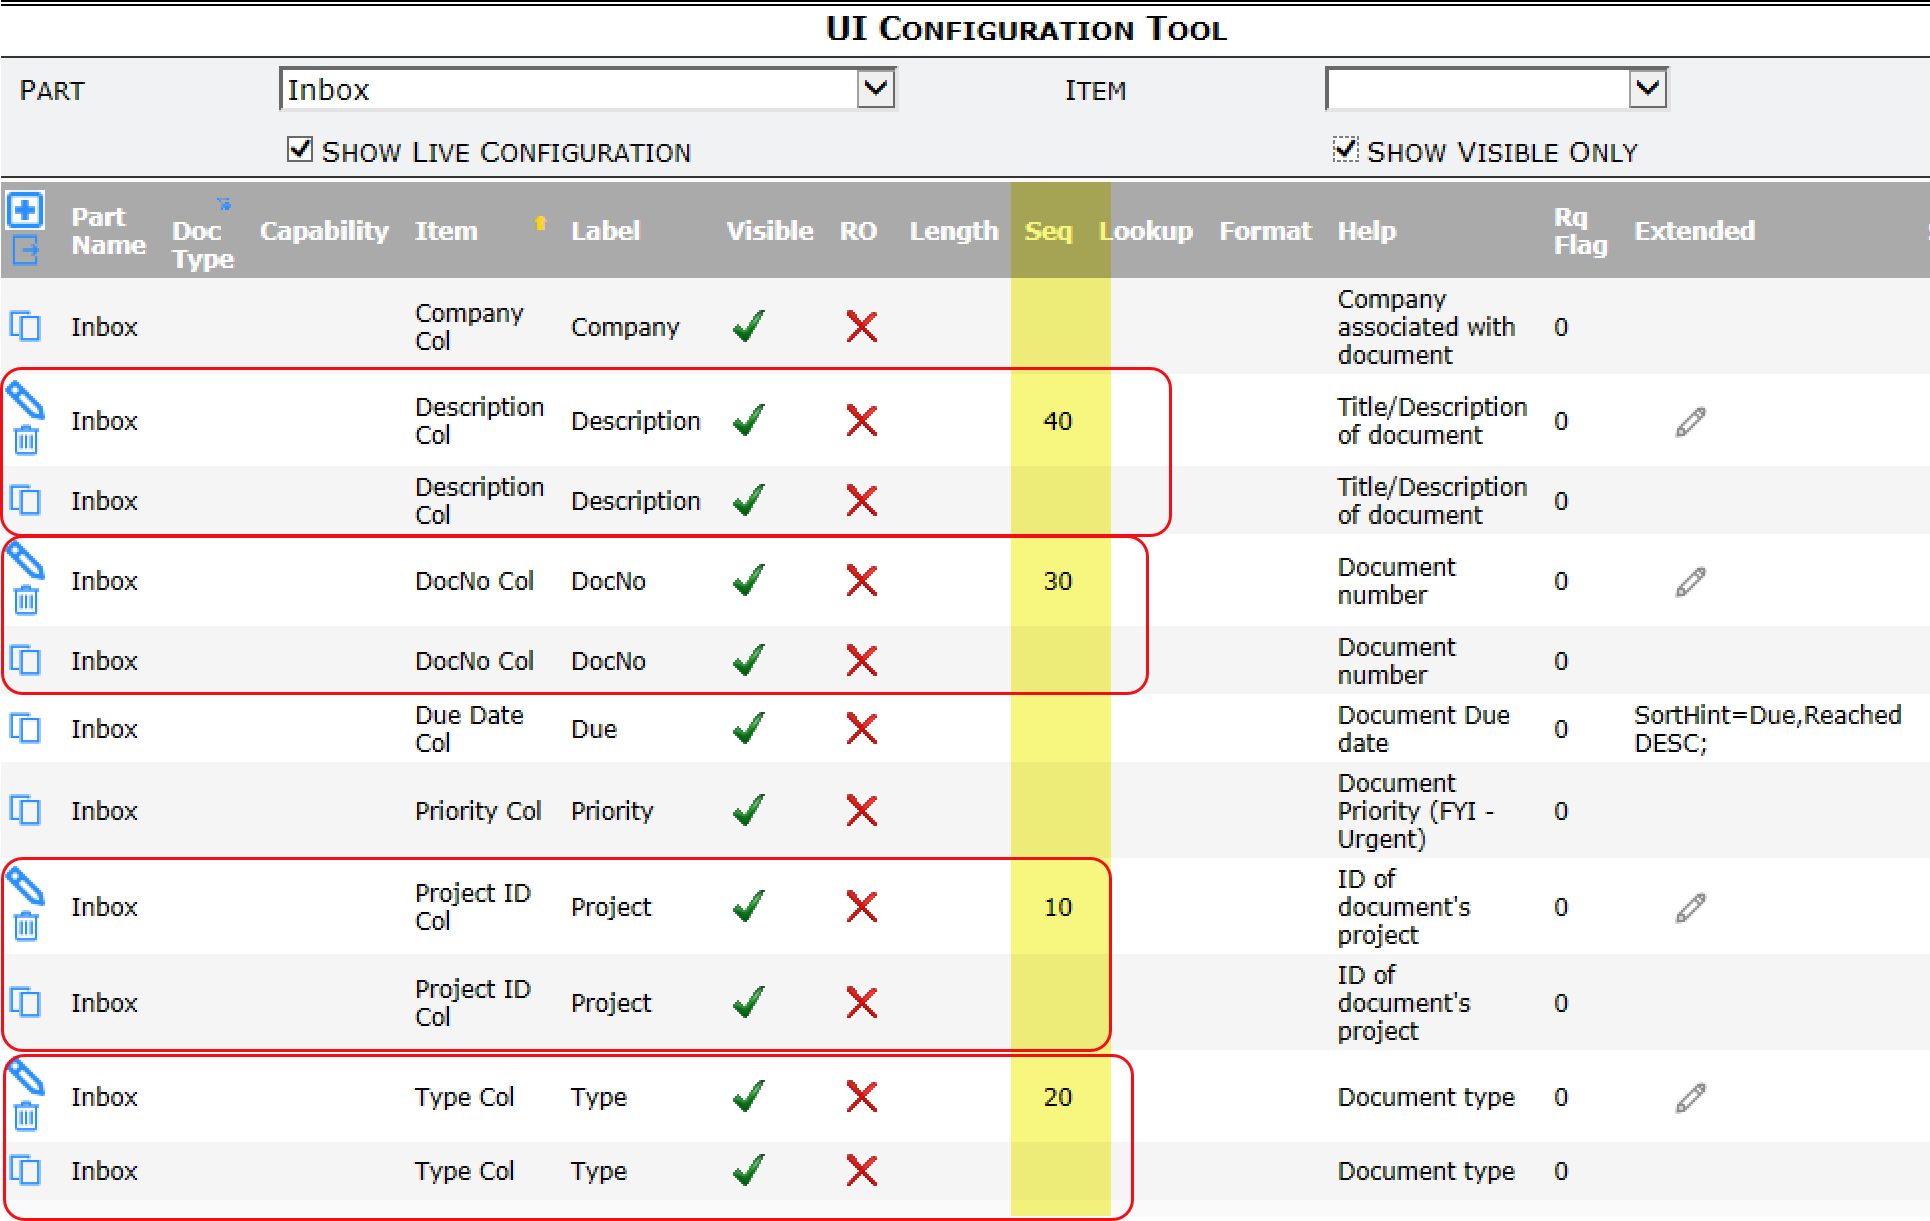
- Note that any columns without a Seq number will be pushed to the right and then displayed in their default order. Also, if two columns have the same Seq number, Spitfire will select one to be at that sequence and the other to be next to it, based alphabetically on internal names.