
The way you create the first Pay Application document is different from the way you create other Pay Application documents.
Prerequisite
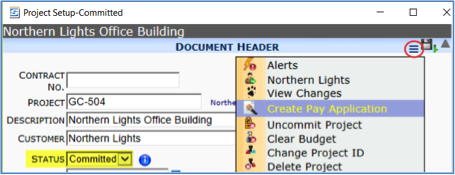
The Project Setup document must have a status of Committed before you can create the initial Pay Application document (and first SOV workbook) for the project.
To create the initial Pay Application:
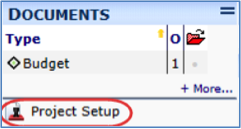
- On the Project Dashboard, under the Documents menu, click Project Setup.
- On the Project Setup, click the Document Options menu in the upper, right-hand corner, and select Create Pay Application.
Note: If you are integrated with Microsoft Dynamics SL, Spitfire will populate Construction Billing Entry with your Project Setup Items. However, if you have activated the Spitfire Pay Application Doc Type, the Project Setup document will populate the Pay Application document instead of Microsoft Dynamics SL’s Construction Billing Entry. - (optional) Enter a different Description for the Pay Application.
- In Responsible, enter or lookup a person (aka biller)
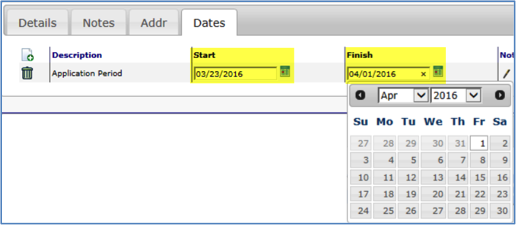
- On the Dates tab, enter the Application dates.
- (optional) Add additional information to the documents as needed.
- Save the Pay Application.
- Click the Excel icon to open the SOV workbook.
- (optional) Add SOV rows to the workbook through the Copy-In option.
- Edit and save, close and reopen the SOV workbook as needed.
- Save, close, and reopen the Pay Application document and changes its Status as needed throughout its draft to invoiced process.
- When appropriate, reopen the SOV workbook and use the SOV Print Form to print the PAPT output for distribution to the client.
- When you are ready to invoice, change the Status to Invoiced.
– If you are not integrated with an accounting system, enter a number in Invoice # and Save.
– If you are integrated with an accounting system, save after changing the Status. An invoice number from the accounting system will populate Invoice #.
Note: You can also change the status to Invoice and acquire or assign the Invoice number from within the SOV workbook.