Question:
We have set up our site for DocuSign integration but would like to take advantage of the eNotary option in DocuSign because some of our documents require Notary witness. What additional steps do we have to take?
Answer:
If you are on V2020 or later, and have read KBA-01751 through KBA-01756 as well as KBA-01793, you can take the following additional steps to use the eNotary feature in DocuSign.
- While regular DocuSign integration requires a Business Pro account with DocuSign, the eNotary feature requires the eSignature Enterprise Pro edition of DocuSign. This requirement comes from the DocuSign company itself. So your first step is to talk to a DocuSign rep. Spitfire support can give you the name of such a representative, if you need one.
- Create an In House Notary role in Roles Maintenance.
- This new role must have Notary as the Responsibility and must include the CSTM |Internal Staff capability.
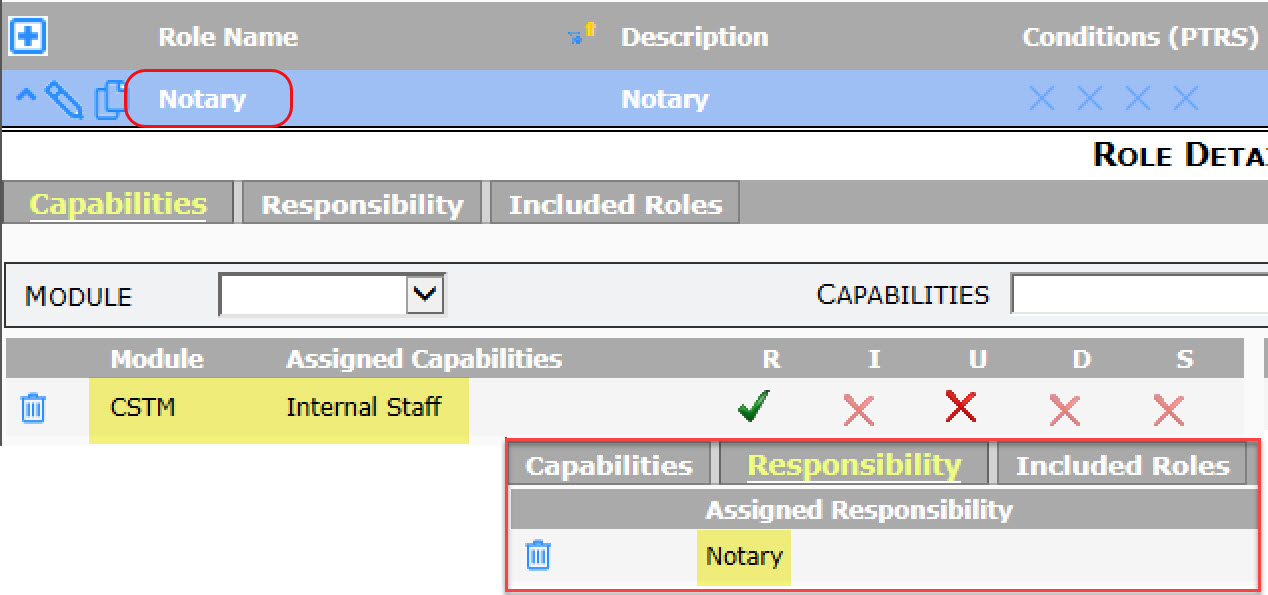
- The Notary role can be either a global role (if you have only one notary in-house for all projects) or project-specific (if different notaries will handle their own specific projects).
- If a project partner also has their own Notary, add a Outside Notary role with just the Notary responsibility.
- This new role must have Notary as the Responsibility and must include the CSTM |Internal Staff capability.
- Add one or more notaries to your Contacts. Each notary must
- have a unique email address
- be given a role with the Notary responsibility
- If a notary is in-house, make this Contact an Employee.
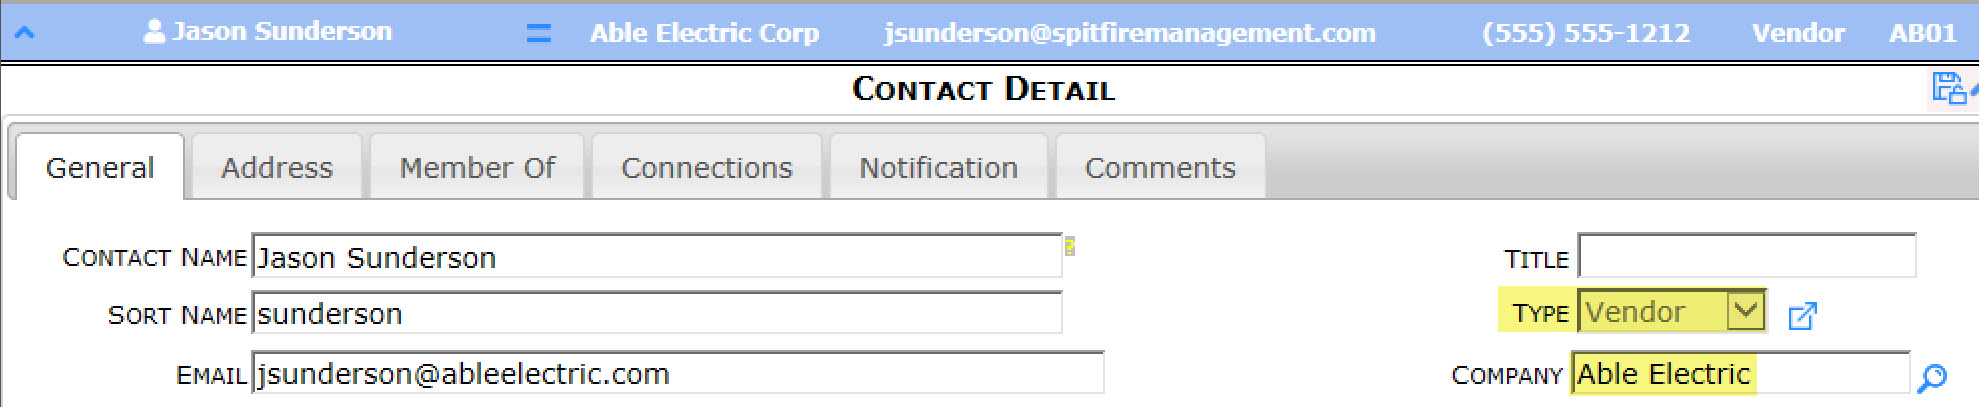
- If you are adding notaries for vendors, make those Contacts Vendors and make sure they have the same Company as the Contacts they will be witnessing. For example, if Jason Sunderson is the notary at Able Electric:
- If you have several notaries, you can and should add those people to the correct project teams. You can have more than one notary on a project.
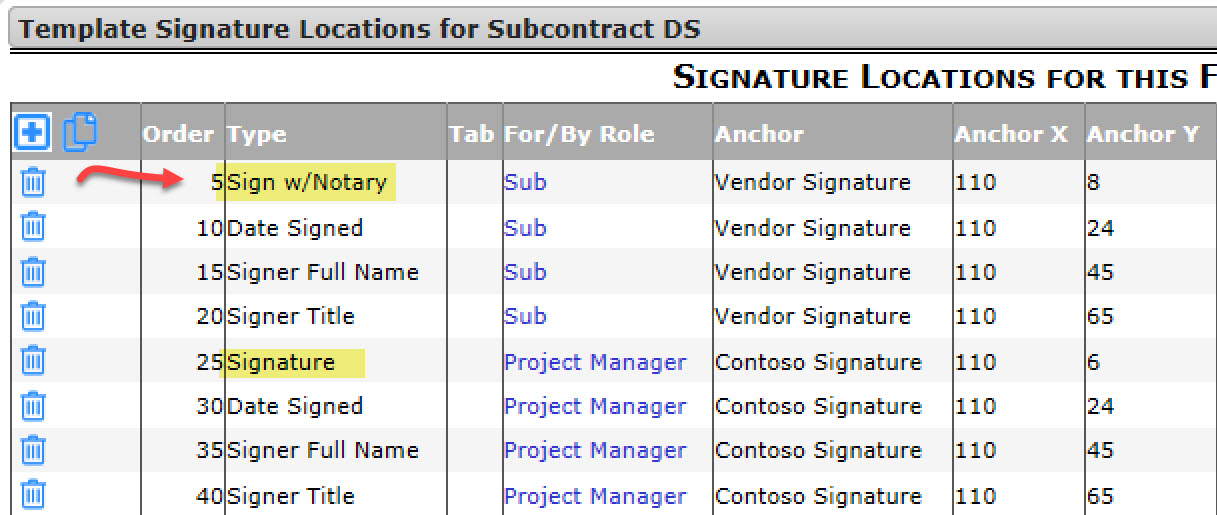
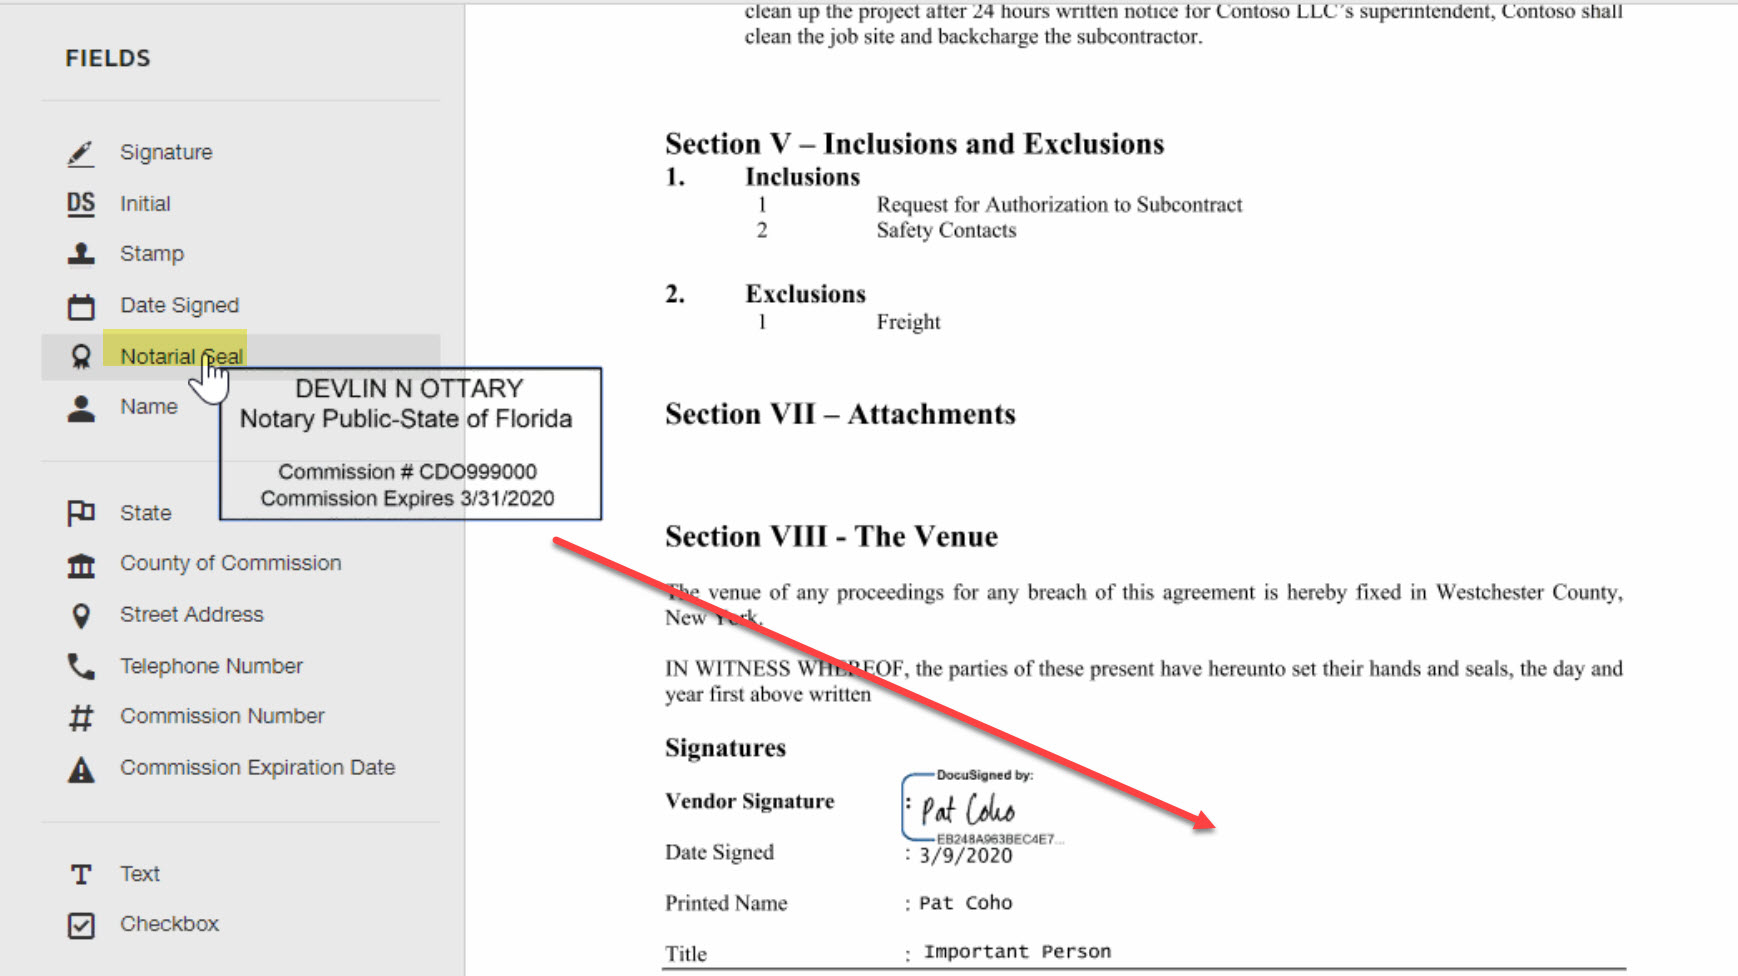
- Open the Template Signature Location tool for the template that you have already configured for DocuSign (or read KBA-01753 and KBA-01754 first).
- Look for the role representing the person whose signature needs to be notarized.
- Change Signature to Sign w/Notary.
- Do NOT include the notary on your routes or predefined routes. DocuSign will send the to-be-notarized document to the notary, who will then contact the signer on the route.
How It Works:
Once everything is set up correctly, and a Spitfire document is routed via DocuSign:
- People who have the Notary role and the same company as the person on the route (or who are global employee notaries) will receive an email from DocuSign.
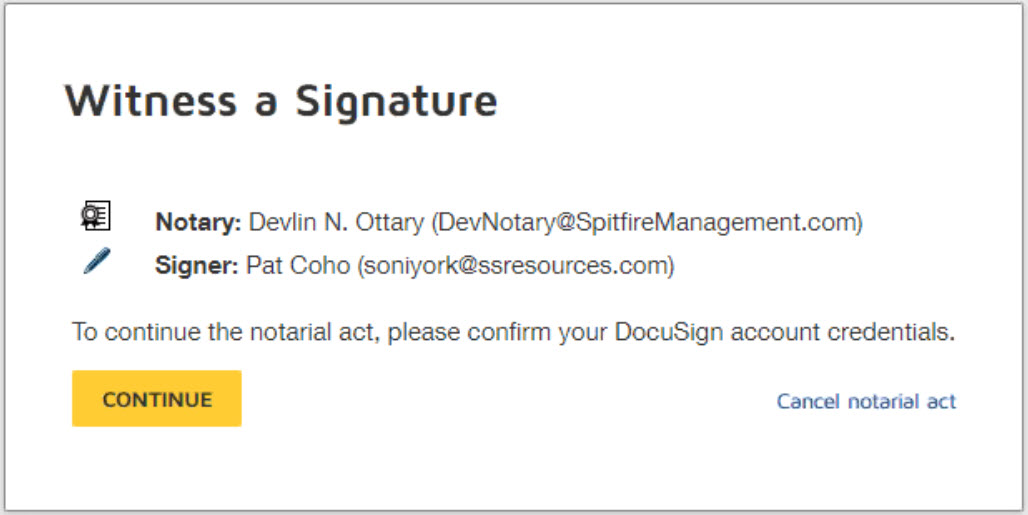
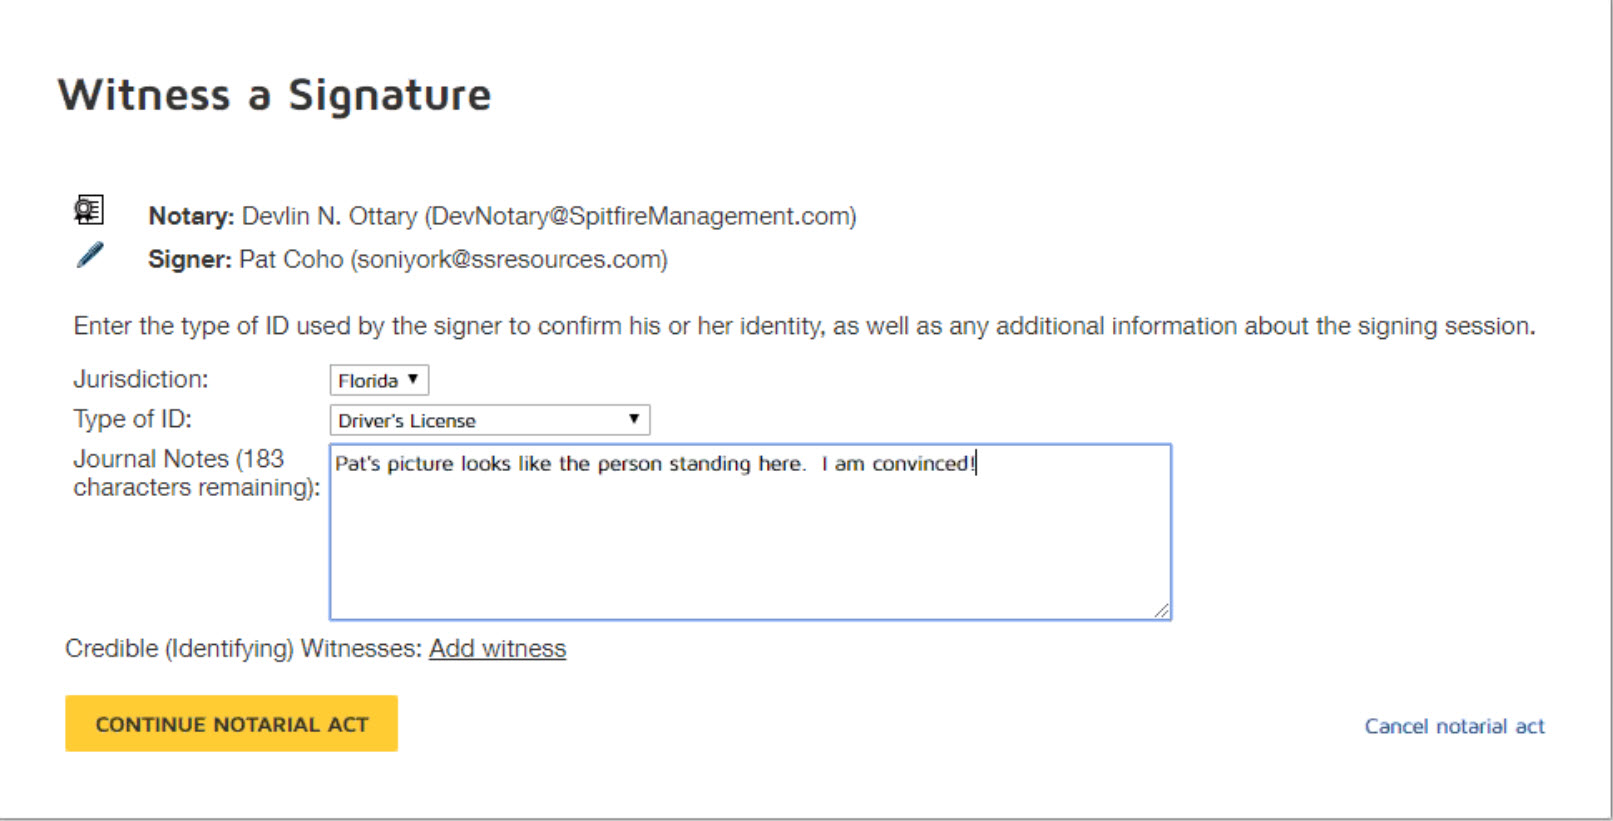
- When they click a link on the email and get to DocuSign, they will see a message such as the following:
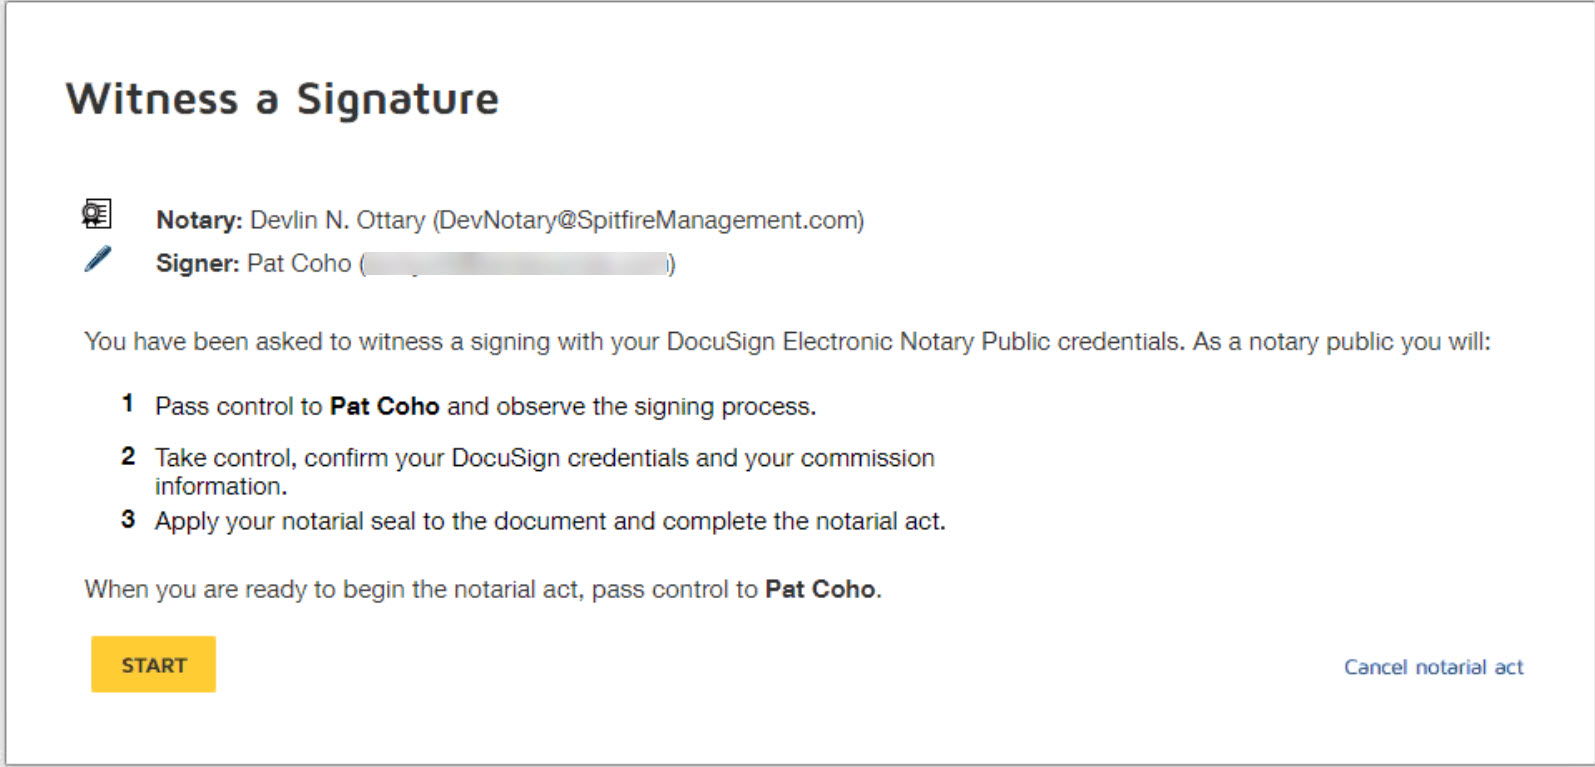
- DocuSign will guide the notary and the signer, who will sign the document as usual in DocuSign (see KBA-01758) but in front of the notary.
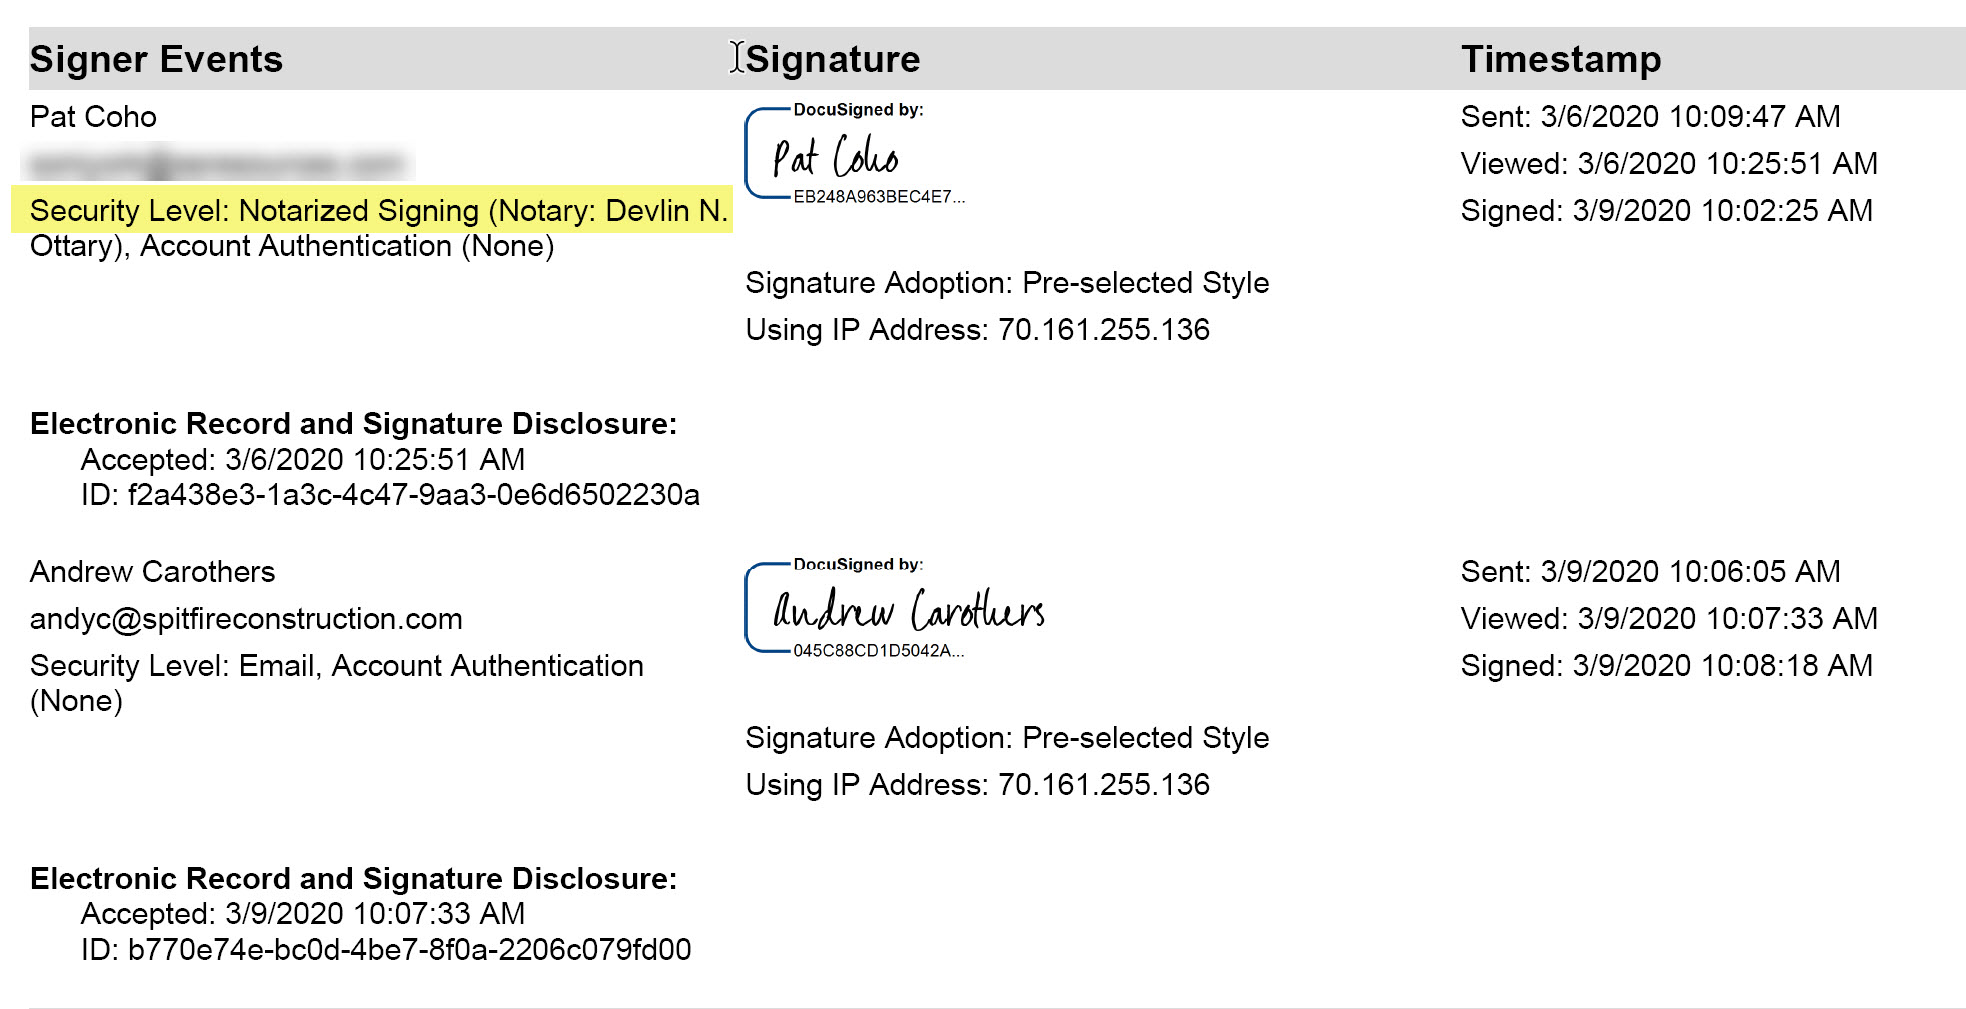
- Once everyone who is supposed to sign the document has done so, the signed PDF will be attached to the Spitfire document. A second file, with DocuSign summary information, will also be attached to the Spitfire document. This file will indicate the notary, for example:
KBA-01794; Last updated: March 31, 2020 at 9:30 am