Invitation to Bid documents can be created at any time during the project’s life cycle in the following two ways:
– From the Site Menu if you are not yet working on a project, or
– From the Project Dashboard if you are already working on the a project.
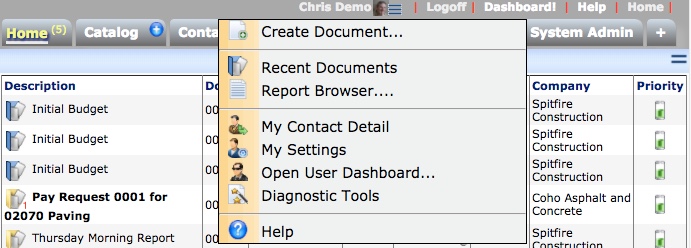
To create an Invitation to Bid from the Site Menu:
- From the Site Menu, select Create Document.

- From the Create a New Document pop-up window, select Create Invitation to Bid.
- Continue with step 2 in the instructions below.
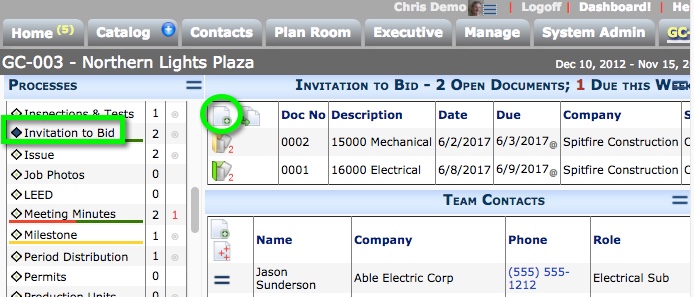
To create an Invitation to Bid from a Project Dashboard:
- From the Project Dashboard, select Invitation to Bid from the Documents list, and click Add.

- (optional) Change the Description.
- Change the Due Date to indicate when all bids must be received.
- (optional) On the Addr tab, from the Type drop-down list select Respond To, and in From lookup the individual the potential vendors will respond to.
- Save the document.
- (optional) Add Attachments if necessary.
- If you will route the document, go to the Route Detail tab and select the Build Route.
- In the Build Route window, click Add using multiple selection to search for the vendors.
- Use the filters to locate and select the vendors.
- In Role perform a lookup for a Vendor Contact.
- Click OK.
- When appropriate, change the Status of the document to Published. By default, Published is a pending status allowing the Invitation to Bid document to be seen on the Plan Room Dashboard.
- Either route the document to all your vendors or Save and Close the document.
You can reopen the document as needed to make changes.
Replies from Vendors
Once your vendors contact you, you can choose to creates RFQs or a Bid Package depending on your workflow. You can easily attach the Invitation to Bid to the Bid Package and easily create RFQs on the Bid Package for the vendors who agree to the Invitation.
To record a vendor’s response:
- Open the Invitation to Bid document.
- On the Route Detail tab, edit the row for the vendor who responded (ie, from the Status drop-down list, select Responded).
