

The SOV line items (row 5 – virtually unlimited) are of four types. At first only regular line items will appear. As you edit and use the SOV workbook, other types of line items will be added.
- Regular line items (manually added or copied from the Project Setup) appear as regular text.
- New lines created by Change Orders (ie, line items copied from an approved Change Order) appear as bold text.
- Information rows indicating which SOV lines have been changed through a Change Order appear as italic text on a purple background.

- Headers, used to group the line items that come after, appear as italicized purple text on a light grey background.

- Subtotals, used for the sum of items identified through criteria, appear as bold text on a cyan background.

| Current Contract Total (after SOV line items) | The sum of all original SOV values as they are after any changes. |
| New COs Line Amount | The sum of all Change Order SOC values listed above. |
| Current SOV Total | The sum of all regular and Change Order SOC values. |
| Application Retention | The sum of the work and material retention for the completed work and material on this application. |
| Current Payment Due | The total payment due for this application. |
| Tax Rate (if applicable) | Contains the tax rate as well as the tax amount for each appropriate column, including total tax amount and tax balance. |
| Project Row with Tax (if applicable) | Contains the sum of the project values with tax for each appropriate column. |
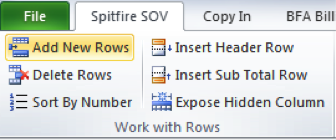
Adding and Deleting Rows
To add a row:
- Either double-click a cell or select a cell and click Add New Rows from the Spitfire SOV ribbon.
A row will be added to the Application worksheet and assign it a System Item number, which cannot be changed, and a Control number, which can be changed, based on the location of the current active cell.If current cell is Row is added Control number is Below last item row (where it says “Double-click on this row”) Below last item (making it last) Last Item number plus 100 First item row Above first item (making it first) First Item number minus 10 Somewhere in the middle Above the current cell An Item number approximately halfway between the Item numbers where the row was inserted. If the spread is 1, the number is defaulted to 99999. You will need to provide a suitable number manually. - Type a description then press Tab.
To delete a row:
- Click a cell within the row you want to delete.
- Click Delete Rows from the Spitfire SOV ribbon.
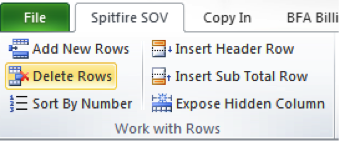
Note: If the row has prior values or current values, a status line message will inform you that the row has a value and cannot be deleted. If the row has only scheduled values, it can be deleted.
Reordering Rows
Although your SOV items are numbered automatically, you can change the Control numbers for your SOV items. You can then resort your rows. Renumbering is particularly useful when you add Header and Subtotal rows.
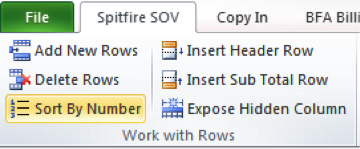
To change Control numbers and sort by new Control numbers:
- Click a cell in the Control No. column.
- Type your new number.
- Repeat as desired on other rows.
- From the Spitfire SOV ribbon, select Sort by Number.
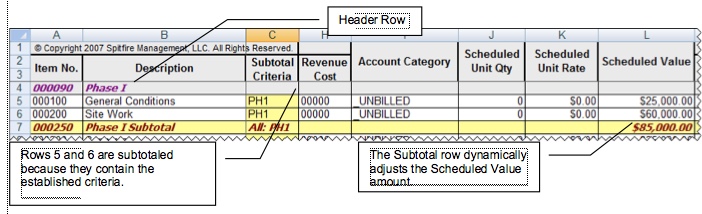
Subtotaling Rows
You can add Header and Subtotal rows to better group your items and calculate their subtotal amount.
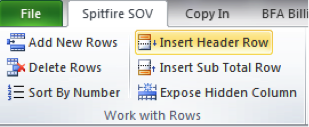
To insert a Header row:
- Click a cell within the row above which you want to insert the Header row.
- From the Spitfire SOV ribbon select Insert Heading Rows to add an empty header row below your current position.
A Special Row Print Location box will appear.

- If the Header should be printed with regular SOV items, click Print with SOVs.
If the Header should print with the Change Order items, click Print with COs.
If you do not want the Header printed, click No Print. - (optional) If you want the subtotals included, select Check if print format contains subtotal page.
- Click OK.
- In the Description column of the new Heading row, enter a title for your group of items.

- (optional) If you want the header row to appear elsewhere, change the Control Number then select Sort By Number.
Note: You can also add Header rows through the Copy In option.
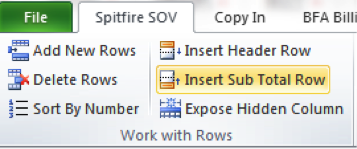
To insert a Subtotal row and indicate the criteria:
- Click a cell in the last row.
- From the Spitfire SOV ribbon select Insert Subtotal Row.
The Special Rw Print Location box will appear.
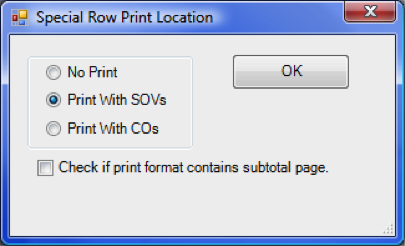
- f the Subtotal should be printed with regular SOV items, click Print with SOVs.
If the Subtotal should print with the Change Order items, click Print with COs.
If you do not want the Subtotal printed, click No Print. - (optional) If you want the subtotals included, select Check if print format contains subtotal page.
- Click OK. The Subtotal Criteria box will appear.
- Enter the criteria you will use to indicate the rows to be included in the subtotal. Criteria are limited to five alpha-numeric characters. (ex: PH1).
- Click OK.
- In the Description column, enter a title for the Subtotal. You may want to make this title the same a the Header’s title.

Note: If you add Subtotal tows through the Copy In option and do not indicate the Subtotal Code in the Copy In worksheet, you must set up the subtotal section criteria once you return to the Application worksheet. To pop up the Subtotal Selection Criteria dialog box, right-click on the subtotal row of the Description column.
To include item rows in the Subtotal group:
- Click on the Subtotal Criteria column of the first row to be included. (The Subtotal Criteria column may have been hidden before, but appears now as Column C.)
- Enter the criteria you established previously for the Subtotal row, for example PH1.
- Enter the criteria at each additional row you want to include in the Subtotal amount. As you include rows, the Scheduled Value amount for the Subtotal row will change to reflect these rows.
