
You can create a Customer Change Order document at any time after the Project Setup’s Status has been set to Committed. A project can have multiple Customer Change Orders, and there are three ways to create them:
- From the Project Dashboard – use this method when the Customer Change Order is your starting document
- From an RFI – use this method when you want information from an RFI to be carried over directly to a Customer Change Order (because you do not use Customer Proposed COs)
- From a Closed Customer Proposed CO – use this method when you want information from a Customer Proposed CO to be carried over to the Customer Change Order
To create a Customer Change Order from the Dashboard:
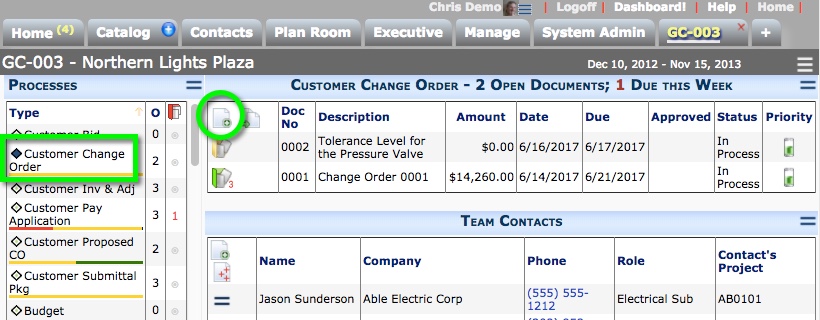
- From the Project Dashboard, select Customer Change Order from the Documents list, and click Add.
- On the Details tab, change the Description.
- On the Document Header, select a Contract Type.
- Save the document.
- On the CI tab and from the Item Actions menu, select Add New or Get Existing.
- Complete the other fields on the document ad needed.
Note: What you enter on the Scope tab appears on the Project CO Request Form. - (optional) In an Attachment Template has been established for the Doc Type, Attach from Template will appear on the Attachments tab. Click the icon to create the printout file for the document.
- Add attachments or create a route, if necessary.
- Either route or Save and Close the document.
You can reopen the document as needed to make changes, change the status of a Change Item, and Post Expense and Post Revenue changes.
When you save a Customer Change Order that has posted revenue amount in its Budget Entries, the amount is added to the Key Performance Indicators area on the Project Dashboard.
Statuses for Customer Change Orders
When a Customer Change Order is first created, the Status drop-down menu offers the following choices: In Process, Canceled, Pending, Rejected.
If the Status is Pending, you can no longer add Change Items (to the CI tab). Also the Status drop-down menu changes: In Process, Approved, Canceled, Pending, Rejected.
If the Status is Pending, you can change the Status to In Process to edit the document.
The Status of Approved does not close the document or make it a read-only document.
Canceled and Rejected “close” the document, and it can no longer be edited.