
Question:
Is there some way I can add Cost Codes to my project after my Initial Budget has been approved?
Answer:
Yes. Cost Codes are generally added to a project through the Initial Budget’s BFA workbook. However, there are several places where you can add Cost Codes “on the fly” once your project is underway (provided you have the PART | Maintain Cost Codes capability with Insert permission in your role.)
Validation:
Cost codes are made up of one to six segments, each of which can–and should–require validation against a predetermined list (often a code set in the Code Maintenance tool–see How to Add New Valid Cost Codes on Your Site for more info–or lists in an integrated Dynamics SL system). Spitfire will only accept new cost codes that pass validation.
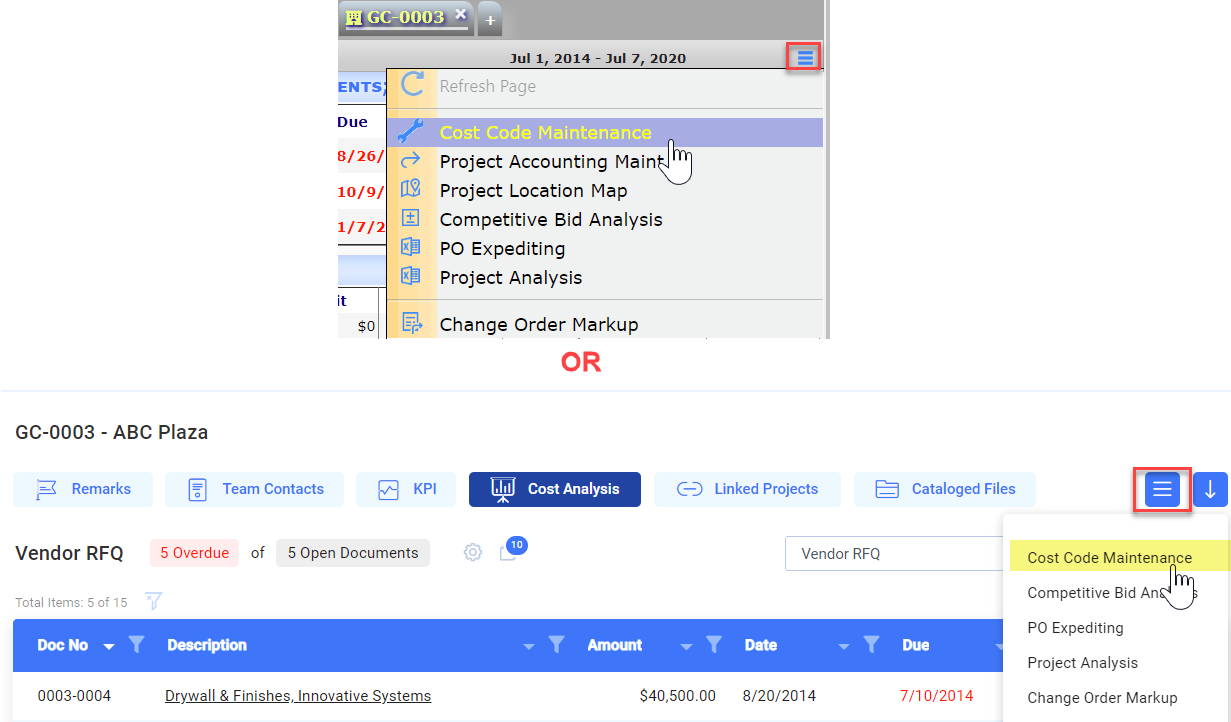
From Your Project Dashboard:
- Open the Project Options menu on your Project Dashboard and select Cost Code Maintenance.
- The Cost Code Maintenance window will open. Click the “Add” icon.
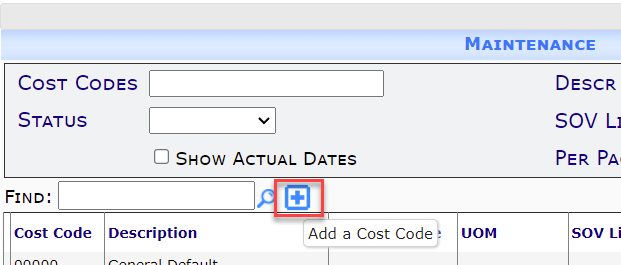
- Enter or look up each segment for your new cost code. Each segment is validated when you tab out of its field.
- Click the checkmark when the cost code is complete.
- Review the Contract Type, UOM, SOV Line, and Costing Method columns and then save.
Note: if you no longer want a cost code in the Code Maintenance window, make it inactive. There is no way to delete it once it appears there.
Through a Commitment/Subcontract or CCO document (provided the document is not yet Committed/Approved):
- On the document, go to the Items tab.
- If you know all segments of your cost code,
- On the Cost Code field, type the cost code that you want to add to the project then tab out. If the new cost code passes validation, Spitfire will accept it on the document and also add it to the Cost Code Maintenance for your project.
- If you want help setting all the segments for your cost code,
- Type one character then click the “Create New Cost Code” icon that appears.
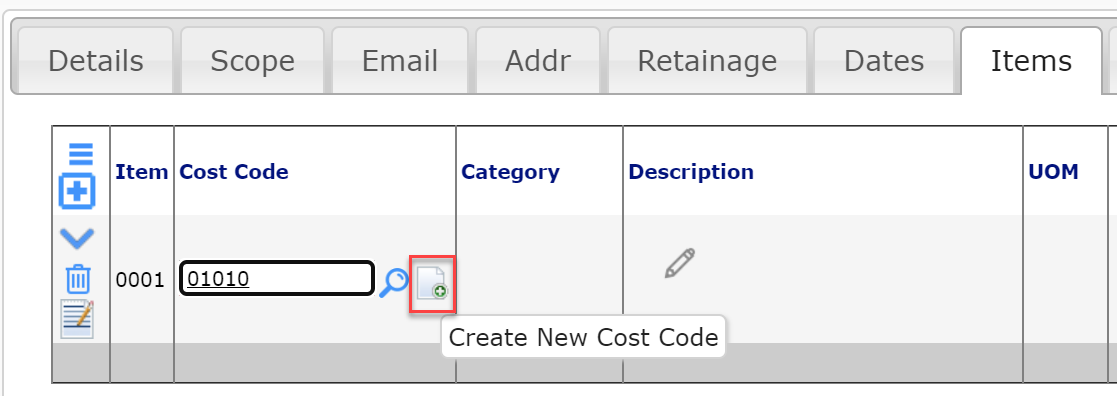
- Look up or enter each segment of the cost code. As you tab out of each segment, Spitfire will validate as necessary.
- Click the Create button when the cost code is complete. Spitfire will add it both to your document and to the Cost Code Maintenance for your project.
- Type one character then click the “Create New Cost Code” icon that appears.
Through a Self-Perform Budget Entry on a Change Item (provided the budget amount has not yet been posted/approved):
- On the Change Order document, go to the Items (CI) tab.
- Open the Budget Entries window for the Item and go to a new or existing Self-Perform row.
- If you know all segments of your cost code,
- On the Cost Code field, type the cost code that you want to add to the project then tab out. If the new cost code passes validation, Spitfire will accept it on the document and also add it to the Cost Code Maintenance for your project.
- If you want help setting all the segments for your cost code,
- Type one character then click the “Create New Cost Code” icon that appears
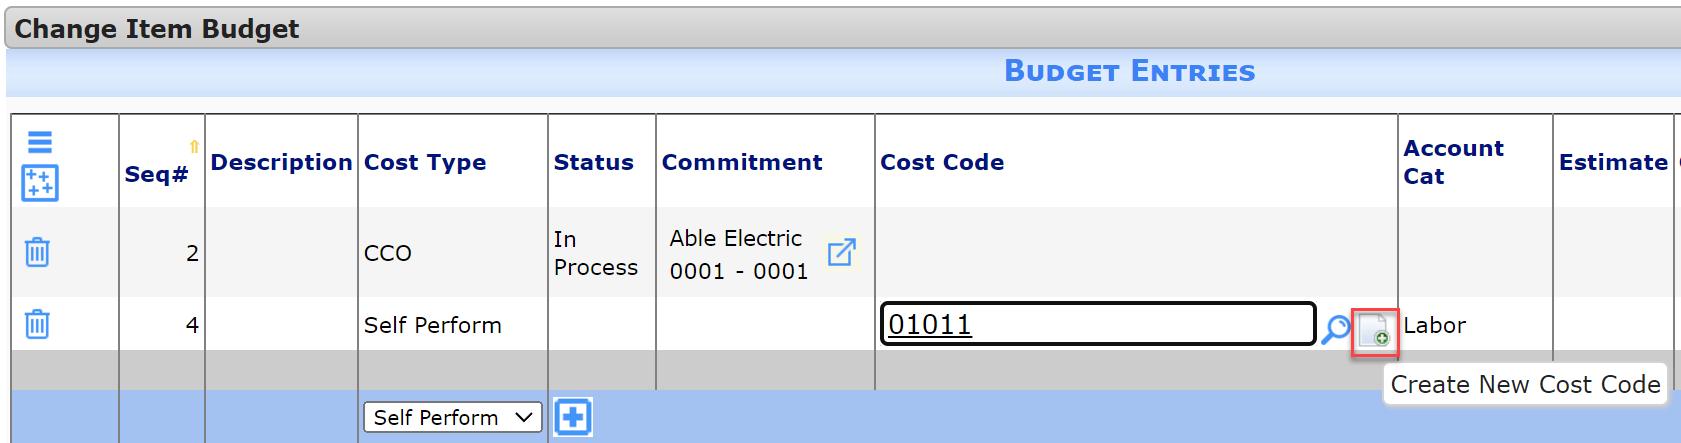
- Look up or enter each segment of the cost code. As you tab out of each segment, Spitfire will validate as necessary.
- Click the Create button when the cost code is complete. Spitfire will add it both to your document and to the Cost Code Maintenance for your project.
- Type one character then click the “Create New Cost Code” icon that appears
Through a Budget Revision:
- Open the BFA workbook from a revised Budget document.
- Select the Add Row option from the Budget ribbon.
- Click in the first segment under Cost Code Key Format.
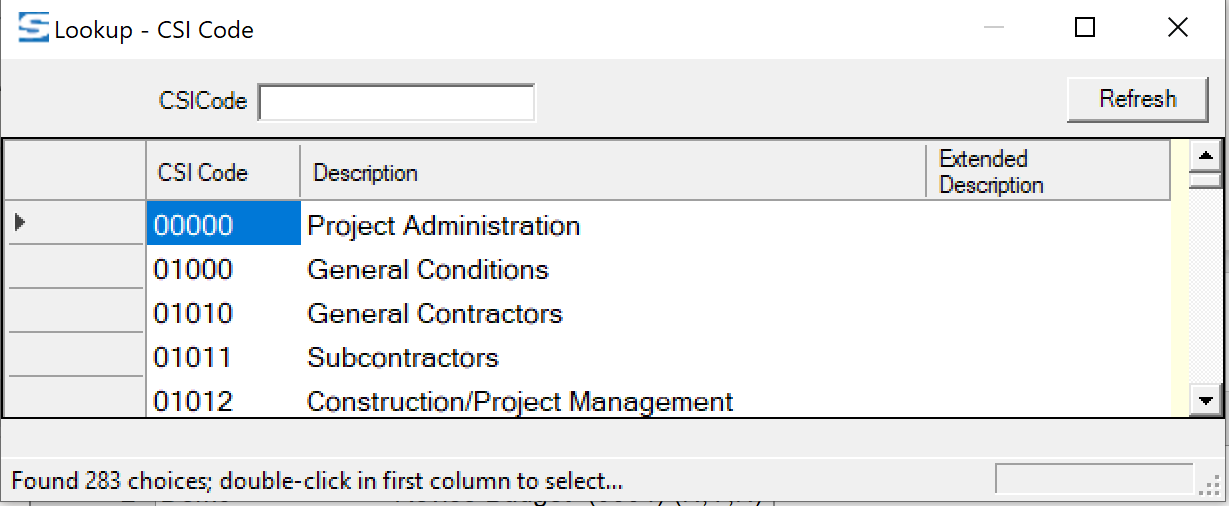
- If the segment requires validation, click the Browse button in the Enter/Browse dialog box.
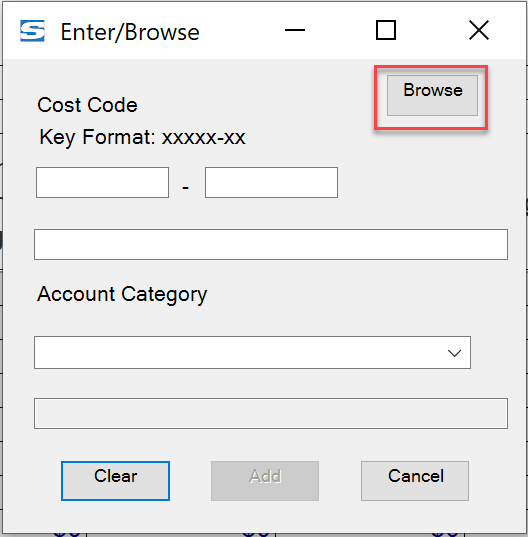
- Select the cost code that you want to add by double-clicking in the first column.
- Repeat for each segment, either clicking the Browse button for your validated choices or entering a freeform segment if no validation is required.
- Select an Account Category for the row from the drop-down.
- Click the Add button.
- The new cost code (and account category) will appear on your new BFA row. In addition, the cost code will be added to your Cost Code Maintenance list.